How the Medium iOS team works effectively with legacy code
The Medium iOS codebase is more than 10 years old, and we still have code dating from 2013 and 2014 that is still in use today.
Jul 29, 2024 / Read More

How the Medium iOS team works effectively with legacy code
The Medium iOS codebase is more than 10 years old, and we still have code dating from 2013 and 2014 that is still in use today.
Jul 29, 2024 / Read More
For a while, that was my feeling when it came to using Cocoapods when writing my iOS apps in Swift.
Some would say that, even if I am quite involved in the Swift world right now (check out my latest article on raywenderlich.com on how to build an app like RunKeeper in Swift), I am not the biggest Swift advocate. And it’s mostly because of these little things like Cocoapods that used to work seamlessly and start to become a pain when you switch to Swift.

Something else I really don’t like — and that’s a personality issue I know I am probably never going to get rid of — is intrusive, unnecessary, it-just-works GUIs. Some of us were afraid of clowns, I dreaded Clippy. In these days of iOS development, that fear came back to me in a form I wouldn’t have expected: my crash reporting tool!

Don’t get me wrong. I love me some crash reports! And until XCode 7 and its new Crash Reports service are released, Crashlytics is definitely the best tool out there for your money, especially for your small and/or open source projects. Its killer feature being, let’s be honest about it, that it’s free!
My only issue was, and still is, the plugin Crashlytics wants you to use in order to “Make things simple™”…
Let’s cut to the chase! To all of you who ran into the same issues I ran into, this is our lucky day! Here’s how to get your Swift project set up with Crashlytics using only Cocoapods and without having to use this oh-so-magical plugin.

I am going to assume you are all familiar with Cocoapods. So, if you haven’t set it up yet, just add a file named Podfile to the root of your project and fill it with these values:
pod 'Fabric'
pod 'Crashlytics'
Then grab your favorite terminal and type the following command:
$> pod install
If you haven’t installed Cocoapods yet, check this really simple Getting Started tutorial. Once you have done that, open the newly created [PROJECT_NAME].xcworkspace file and you should see a new Pods project there, with these two new pods inside. Unfortunately, because Crashlytics is an Objective-C library, you will need a bridging header.
Again, let’s assume you know your way around mix-and-matching Swift and Objective-C inside the same project. If you need more details, just check out Apple’s documentation on having Swift and Objective-C in the same project.
So, create an Objective-C header file and name it [PRODUCT_MODULE_NAME]-Bridging-Header.h. In this file, all you have to do is import Crashlytics like this:
#import <Crashlytics/Crashlytics.h>
You are ready to start using Crashlytics from your Swift code. However, if you try to build your project now, nothing will happen. It’s because you need to tell Fabric that it should start running when your app starts.
To do so, you will have to get the API Key and Build Secret of your organization from Fabric’s dashboard. Once you have them just add the following Run Script Phase to your build phases:
${PODS_ROOT}/Fabric/Fabric.framework/run [API_KEY] [BUILD_SECRET]

Once this is done, open your AppDelegate and add the following method call to the application(application:, didFinishLaunchingWithOptions launchOptions:) method:
Crashlytics.startWithAPIKey([YOUR_API_KEY])
This will start Crashlytics when your app starts.
That’s it! Now build and run your project and your app should directly show in your dashboard!

I hope this little tutorial helped you integrate seamlessly with Crashlytics. One of the good things is, if you want to continue using the plugin (for beta distributions for example, which works pretty well I’ll admit) you still can! This integration is 100% compatible with it!
If you have any questions or issues with what’s been told here, feel free to reach out to me on Twitter at @Zedenem.
Finally, I couldn’t have fixed my issues and written this article without these two resources:
Hope this will help,
This was working as of October 2014:
The ad should have paused and you have no way of unpausing it or accessing the video you wanted to see. You might try to plug the headphones back but it won’t work. Now, when you do the same thing on an actual video, you get the expected behavior:
This is explained in Apple’s documentation in a pretty straight-forward way:
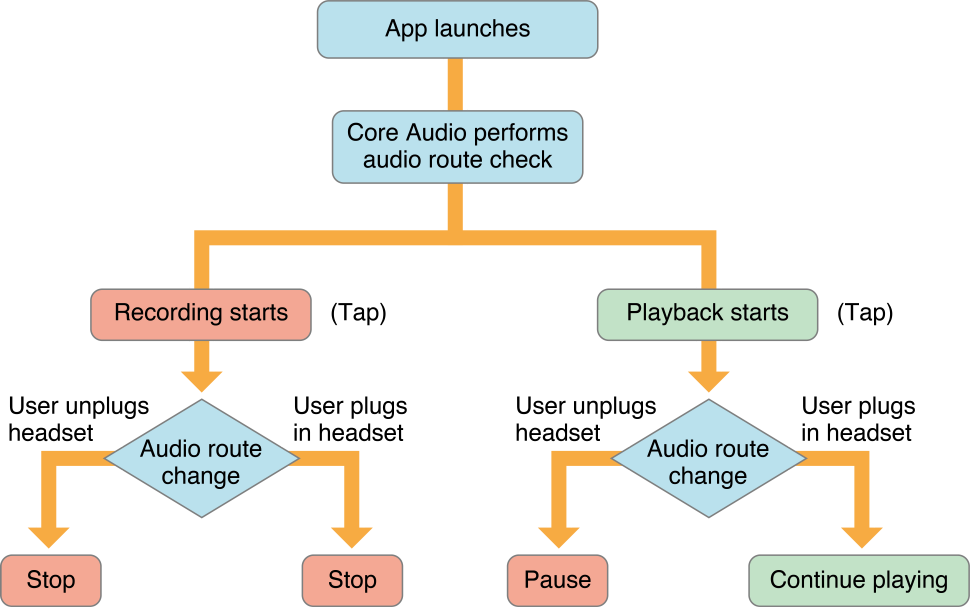
You might think: “well if the player (here the Ad uses AVPlayer) paused, it should have sent a notification telling my code that its state changed. Fixing this issue is just a matter of getting this state change and acting according to it.”
Well, if that was the case I wouldn’t have to write an article about it, would I!
The thing is, Apple’s documentation (See Audio Session Programming Guide: Responding To Route Changes) is pretty clear about the matter but nobody ever wrote a practical example on how to use Audio Output notifications to check if headphones have been plugged while playing a video.
So after digging the web, and especially Stack Overflow for a practical solution that does not exist, here is my take at it! Hope it will help!
Here is what iOS gives us to listen and act upon audio output route changes:
AVAudioSessionRouteChangeNotification
So, we just have to subscribe to it and we will know every time the audio output route changes. Add yourself as an observer:
[[NSNotificationCenter defaultCenter] addObserver:self selector:@selector(audioHardwareRouteChanged:) name:AVAudioSessionRouteChangeNotification object:nil];
Then implement the method you passed as a selector:
- (void)audioHardwareRouteChanged:(NSNotification *)notification {
    // Your tests on the Audio Output changes will go here
}
The AVAudioSessionRouteChangeNotification provides two important objects:
An AVAudioSessionRouteDescription object containing the previous route’s description. Accessible via the key AVAudioSessionRouteChangePreviousRouteKey
An NSNumber object containing an unsigned integer that identifies the reason why the route changed. Accessible via the key AVAudioSessionRouteChangeReasonKey
If you just want to know when the headphones were unplugged, you should use this code:
NSInteger routeChangeReason = [notification.userInfo[AVAudioSessionRouteChangeReasonKey] integerValue];
if (routeChangeReason == AVAudioSessionRouteChangeReasonOldDeviceUnavailable) {
    // The old device is unavailable == headphones have been unplugged
}
Here, you don’t need to check if the previous route were the headphones or not, because the only thing you want to know (and the logic behind iOS pausing the video when the headphones are unplugged) is this: When the device used for output becomes unavailable, pause.
This is great because that means your code will also work in other cases, like if you use bluetooth headphones and you walk out of range of the app, or their batteries die. Also, it won’t pause when you plug headphones back, because this is considered by the OS as a new device becoming available, sending the reason AVAudioSessionRouteChangeReasonNewDeviceAvailable
The AVAudioSessionRouteChangeNotification‘s associated user info is full of interesting data on what happened to the audio output route, and the different routes available and recognized by iOS. Be sure to check Apple’s documentation and especially:
From there, you should be able to access all the documentation you need to, for example, detect when the device is connected to a docking station, etc.
Hope this will help,
Today, my first article as a member of raywenderlich.com‘s Update Team went live! It’s a piece on how to play with NSURLProtocol in Swift, the new programming language Apple released this june at WWDC14. Here it is, hope you will enjoy it: Using NSURLProtocol with Swift
This Article is in French only, as it is about a french-specific topic. Feel free to ask me to publish a translation if needed.
Ma femme et moi partons vivre en Californie où j’ai trouvé un travail en tant qu’ingénieur mobile. Nous partons avec un visa dit E-2 (
sujet qui aura son article), visa qui permet sous certaines conditions aux membres de la famille de l’expatrié de travailler. 
La Caisse des Français de l’Étranger (ou CFE pour les intimes) propose aux expatriés de prendre le relais de leur couverture sociale française afin de leur offrir les mêmes bénéfices à l’étranger. Plus d’infos sur leur site :
Comment et pourquoi choisir la CFE ? Pour en bénéficier, il suffit de remplir un bulletin d’adhésion, celui pour les salariés dans mon cas, et c’est ce que nous allons détailler aujourd’hui. Au moment où j’écris ces lignes, le bulletin d’adhésion salarié est disponible ici : Bulletin d’adhésion salarié
Le bulletin n’est pas particulièrement compliqué à remplir, ni les pièces à joindre difficiles à trouver. Mais, comme certains questions sont un peu retorses, voici un pas-à-pas des éléments sur lesquels j’ai pu buter et pour lesquels le site de la CFE n’a pas été d’une grande aide (et la ligne téléphonique plus floue encore parfois…).
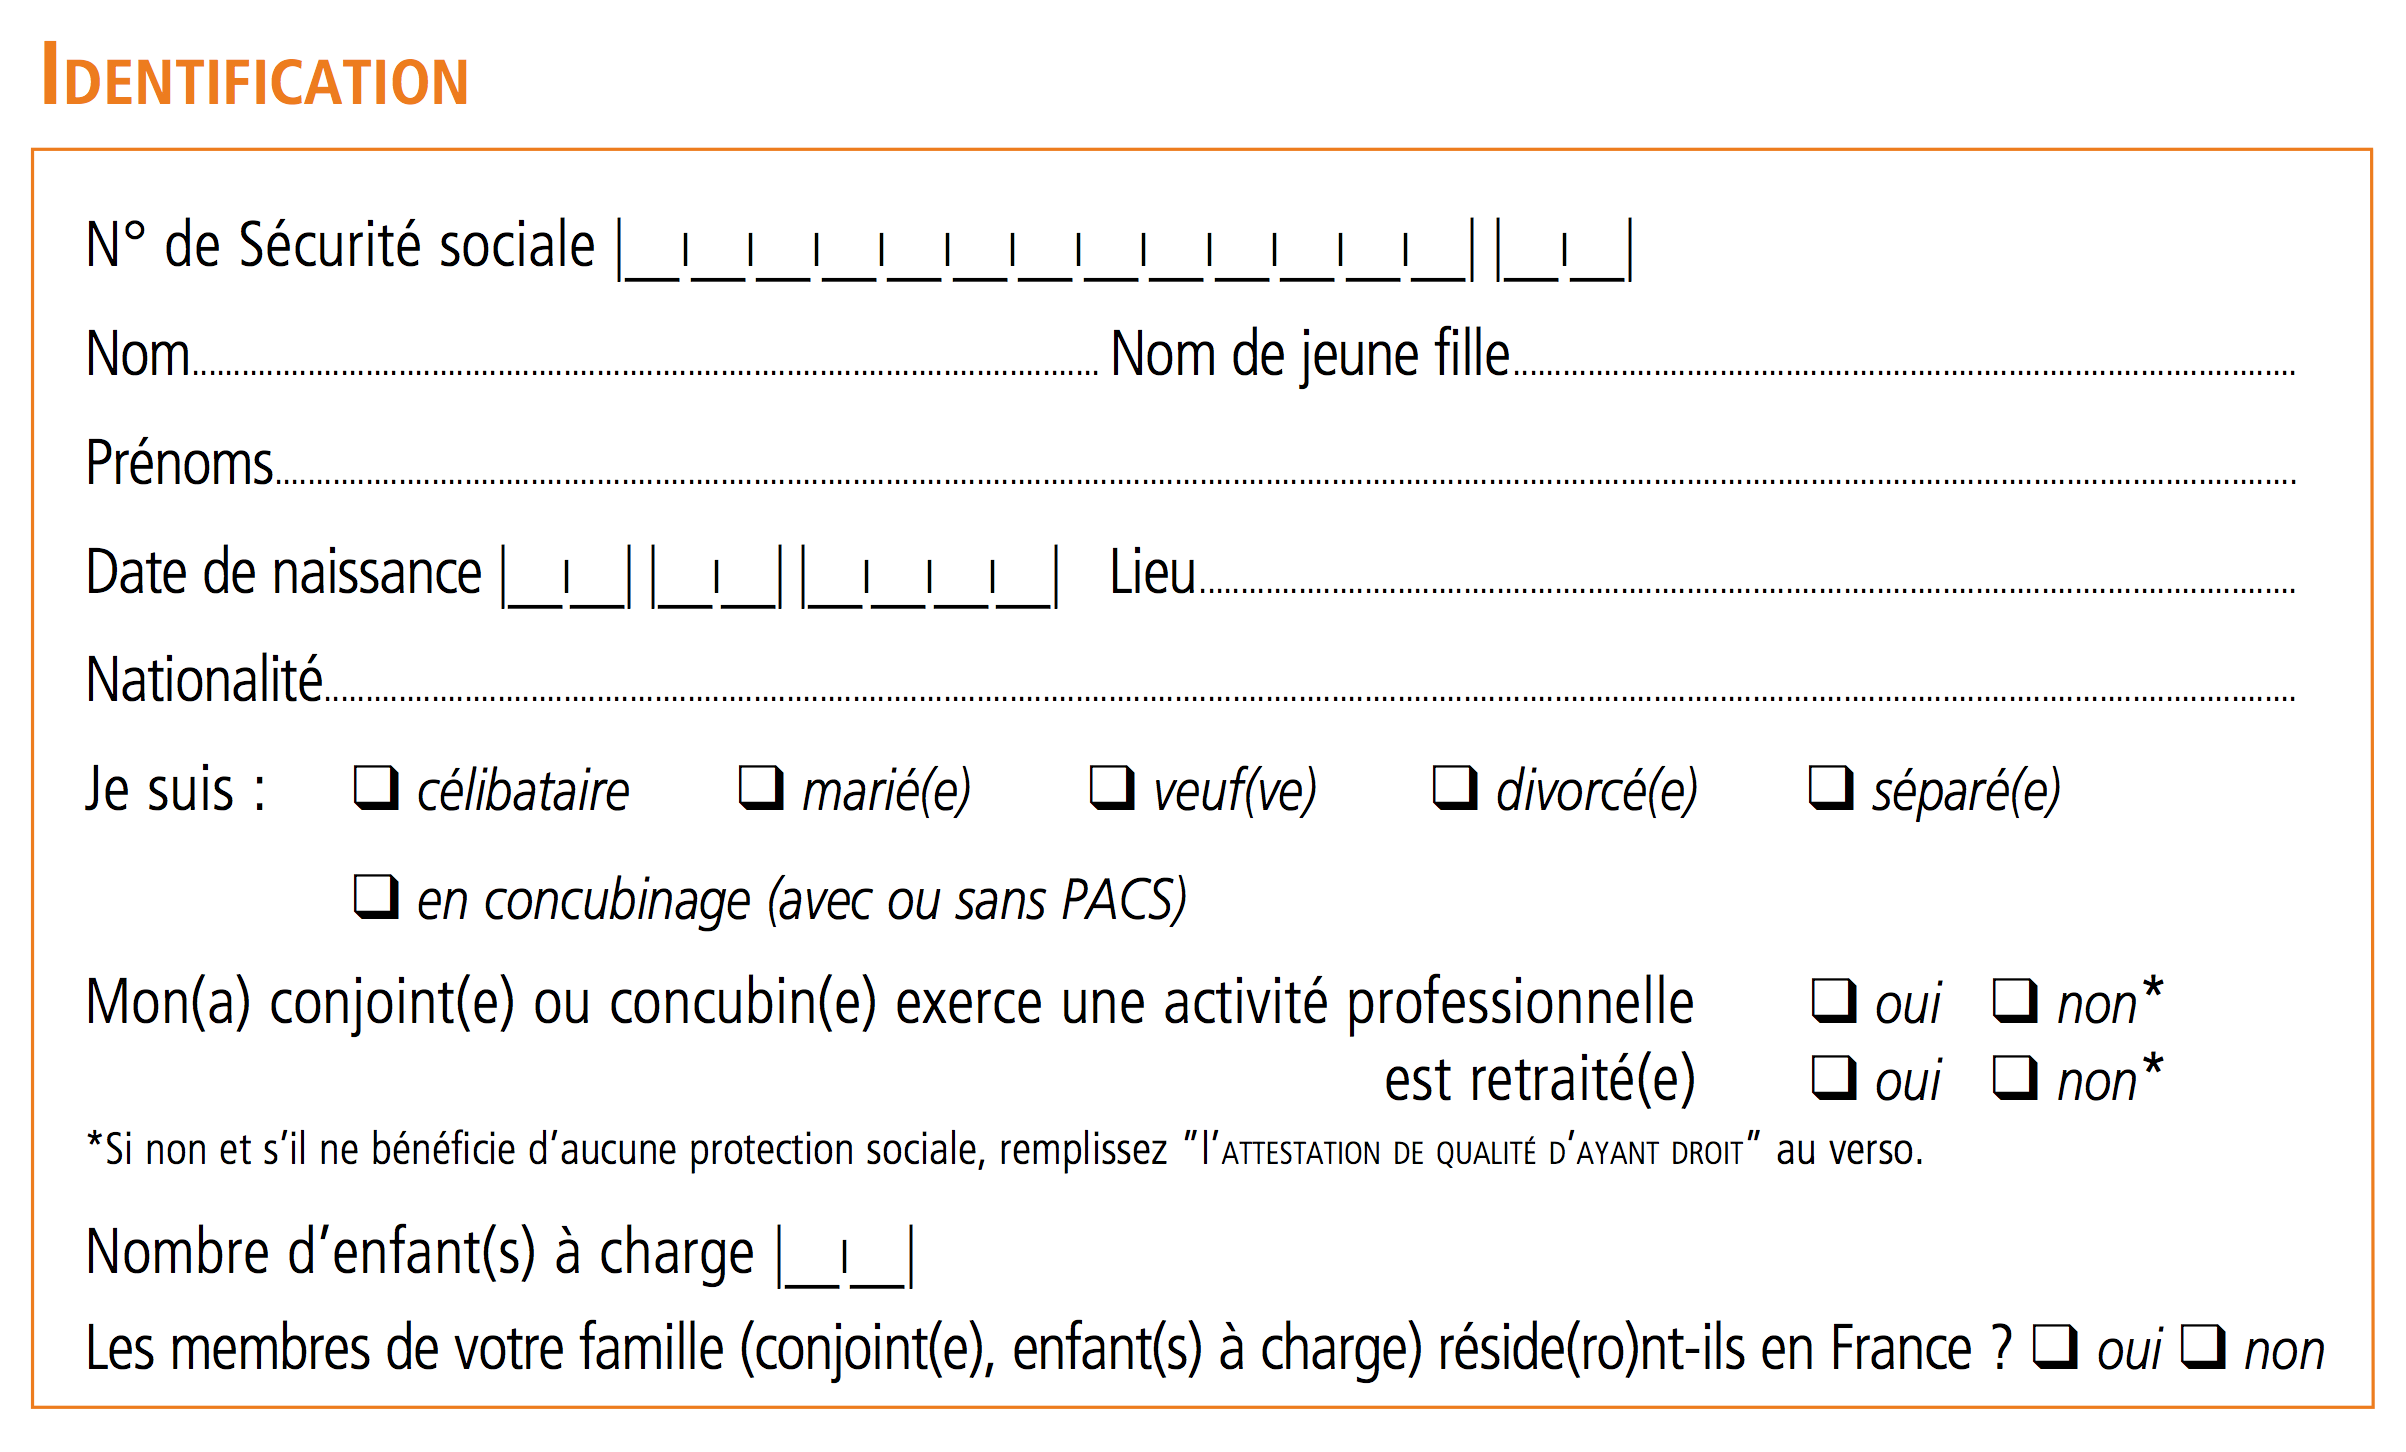 Rien de particulier à noter dans cette partie. Dans notre situation, ma femme me suivant sans emploi au départ et pour au moins 3 mois (délai d’obtention de son autorisation de travail – sujet qui aura son article), nous avons répondu non à la question “Mon(a) conjoint(e) ou concubin(e) exerce une activité professionnelle” et non à celle demandant si elle résidera en France.
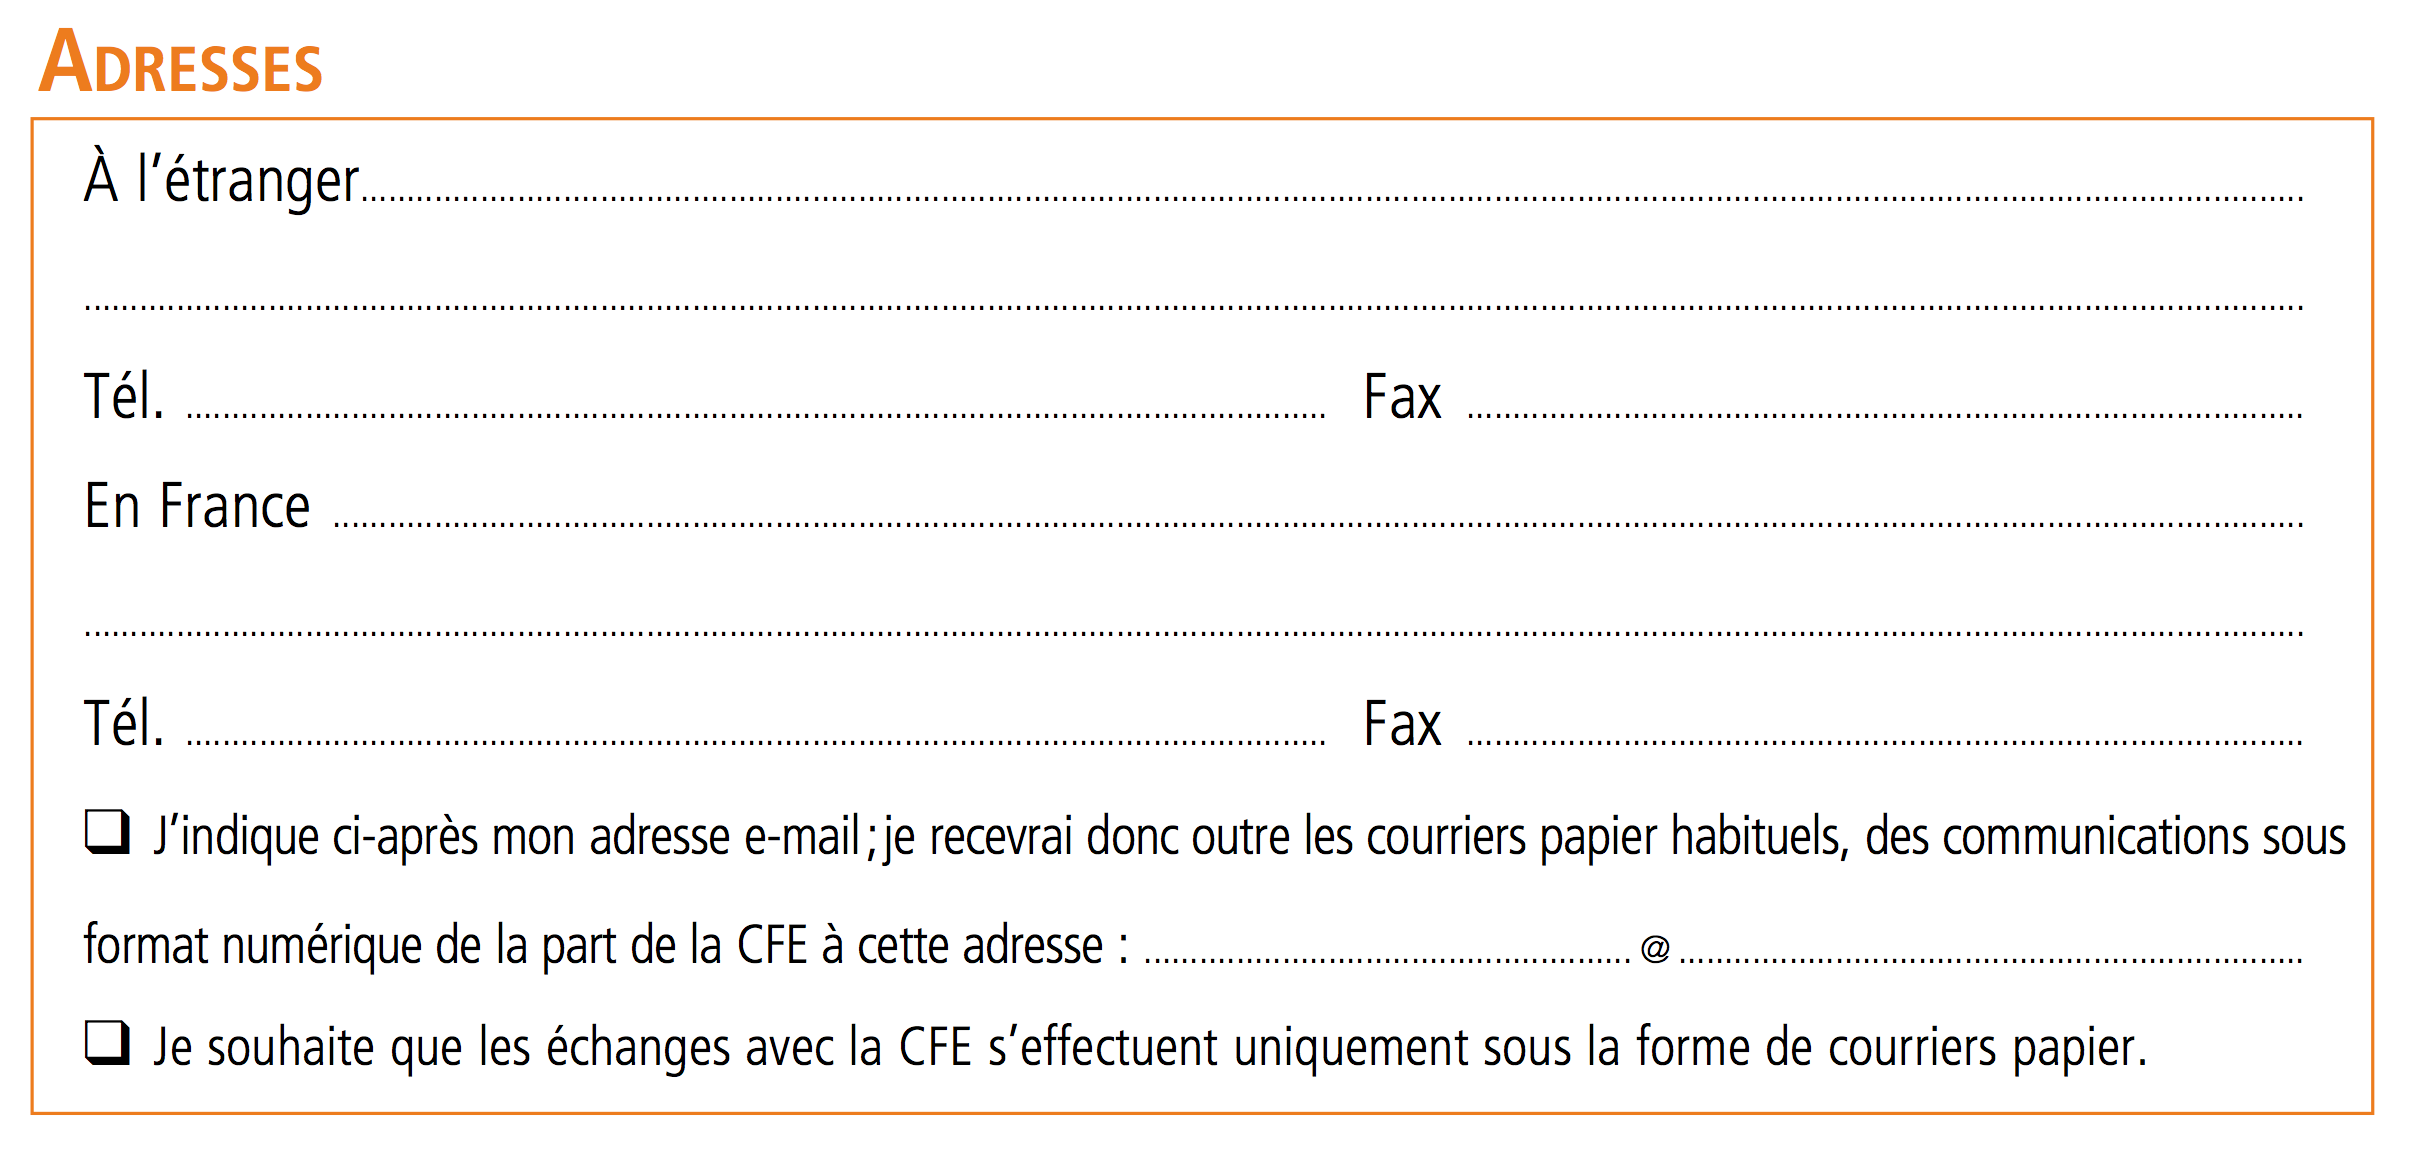 Après renseignement, et vu que la majorité des expatriés doivent être dans cette situation au moment de remplir ce document, il est effectivement possible de donner comme adresse à l’étranger l’adresse de l’employeur, et ce sans nécessité d’apporter des précisions supplémentaires. Les adresses peuvent de toute façon être mises à jour plus tard. Mis à part cela, je ne saurais trop vous conseiller de ne pas choisir l’option “Tout papier”, pour nos amis les arbres, mais aussi pour la pérennité de vos archives personnelles… À noter la taille allouée pour la saisie de l’adresse mail (sic).
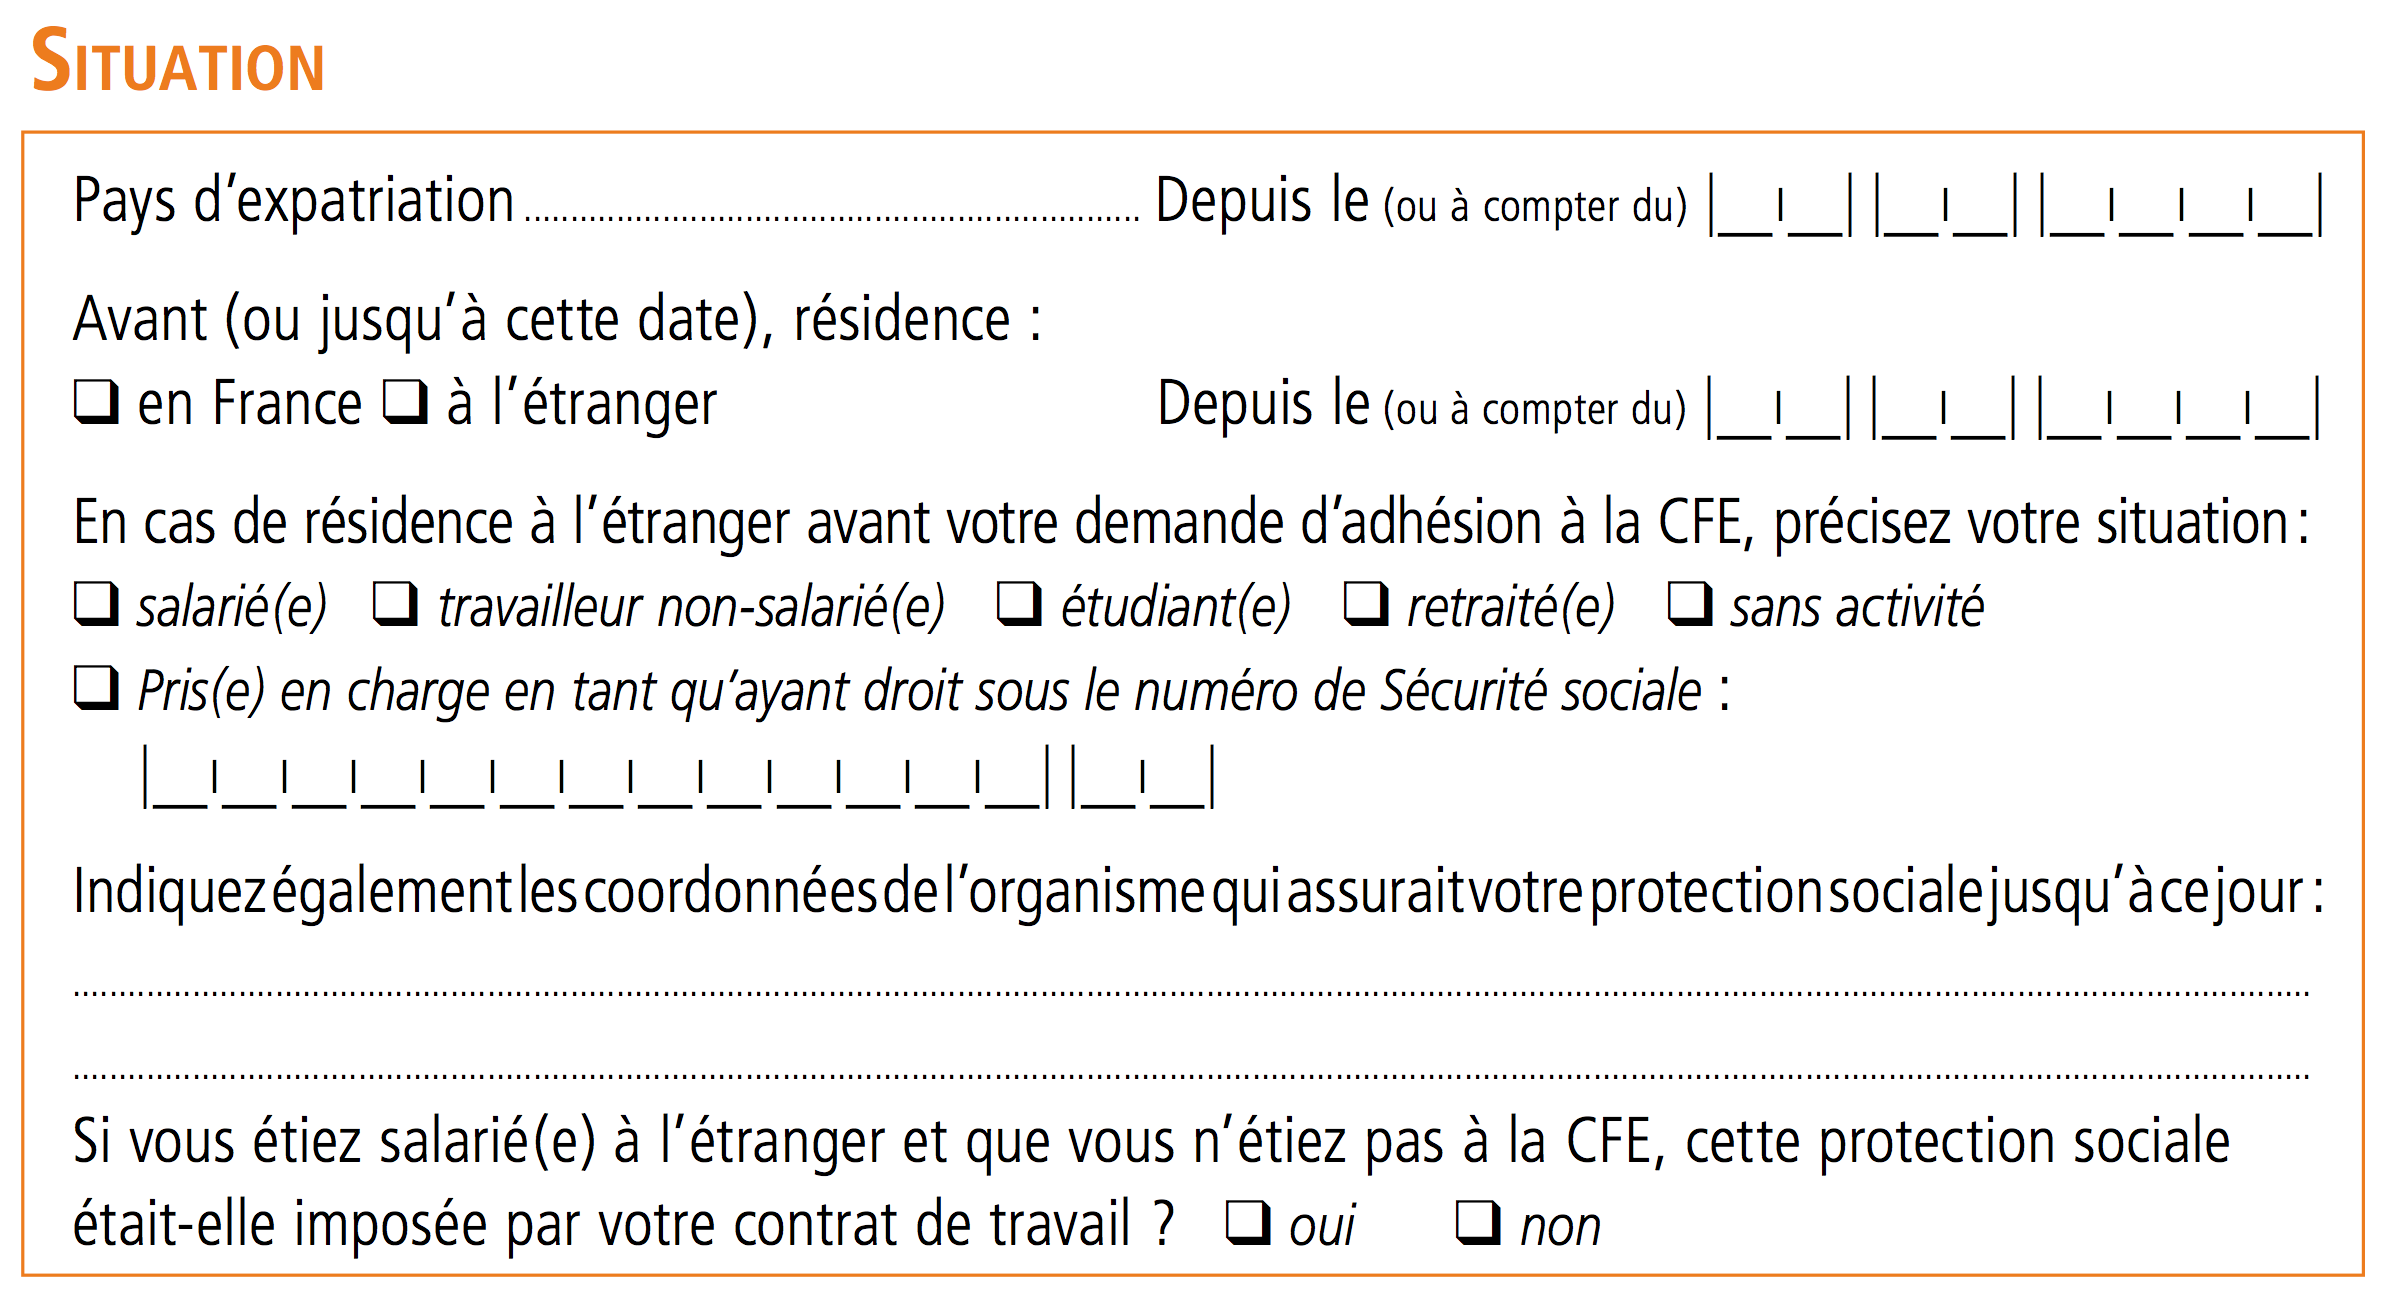 Dans cette section, la saisie de la date d’arrivée dans le pays d’expatriation est très importante car elle va déterminer la date de début de votre prise en charge par la CFE. Voici ce qui est dit à ce propos sur le site de la CFE :
LA DATE D’ADHESION * Dans le délai de 2 ans à compter de votre départ de France*. * Toutefois, nous vous conseillons d’adhérer dans les 3 mois pour ne pas retarder votre droit aux prestations. * Votre adhésion est prise en compte à partir du 1er jour du mois suivant la réception de votre demande. * Au delà de ce délai de 2 ans, l’adhésion est possible, mais la CFE demande un droit d’entrée (paiement de cotisations rétroactives) dont le montant correspond au maximum à 2 années de cotisations. * Aucun droit d’entrée n’est demandé aux personnes âgées de moins de 35 ans à la date d’effet de leur adhésion. * ou d’un Etat membre de l’Espace Economique Européen (y compris la Suisse)
> extrait de la page Salarié : Adhésion >
Bien qu’aucune précision ne soit faite sur le rapport avec la date d’arrivée, celle-ci est quand même prise en compte. J’ai obtenu ce renseignement par téléphone, et je dois avouer que cela reste toujours flou pour moi… Bref, nous avons saisi la date ayant le meilleur rapport proximité / plausibilité car, comme vous le savez sans doute, il est souvent difficile de savoir la date exacte du départ, particulièrement pour les États-Unis. La deuxième partie n’est à remplir que si vous viviez déjà à l’étranger avant cette nouvelle expatriation. Étant rentrés de Berlin pour quelques mois avant de repartir, nous avons décidé d’omettre complètement cette précision. Du coup, pas de conseils particuliers pour cette section. Désolé.
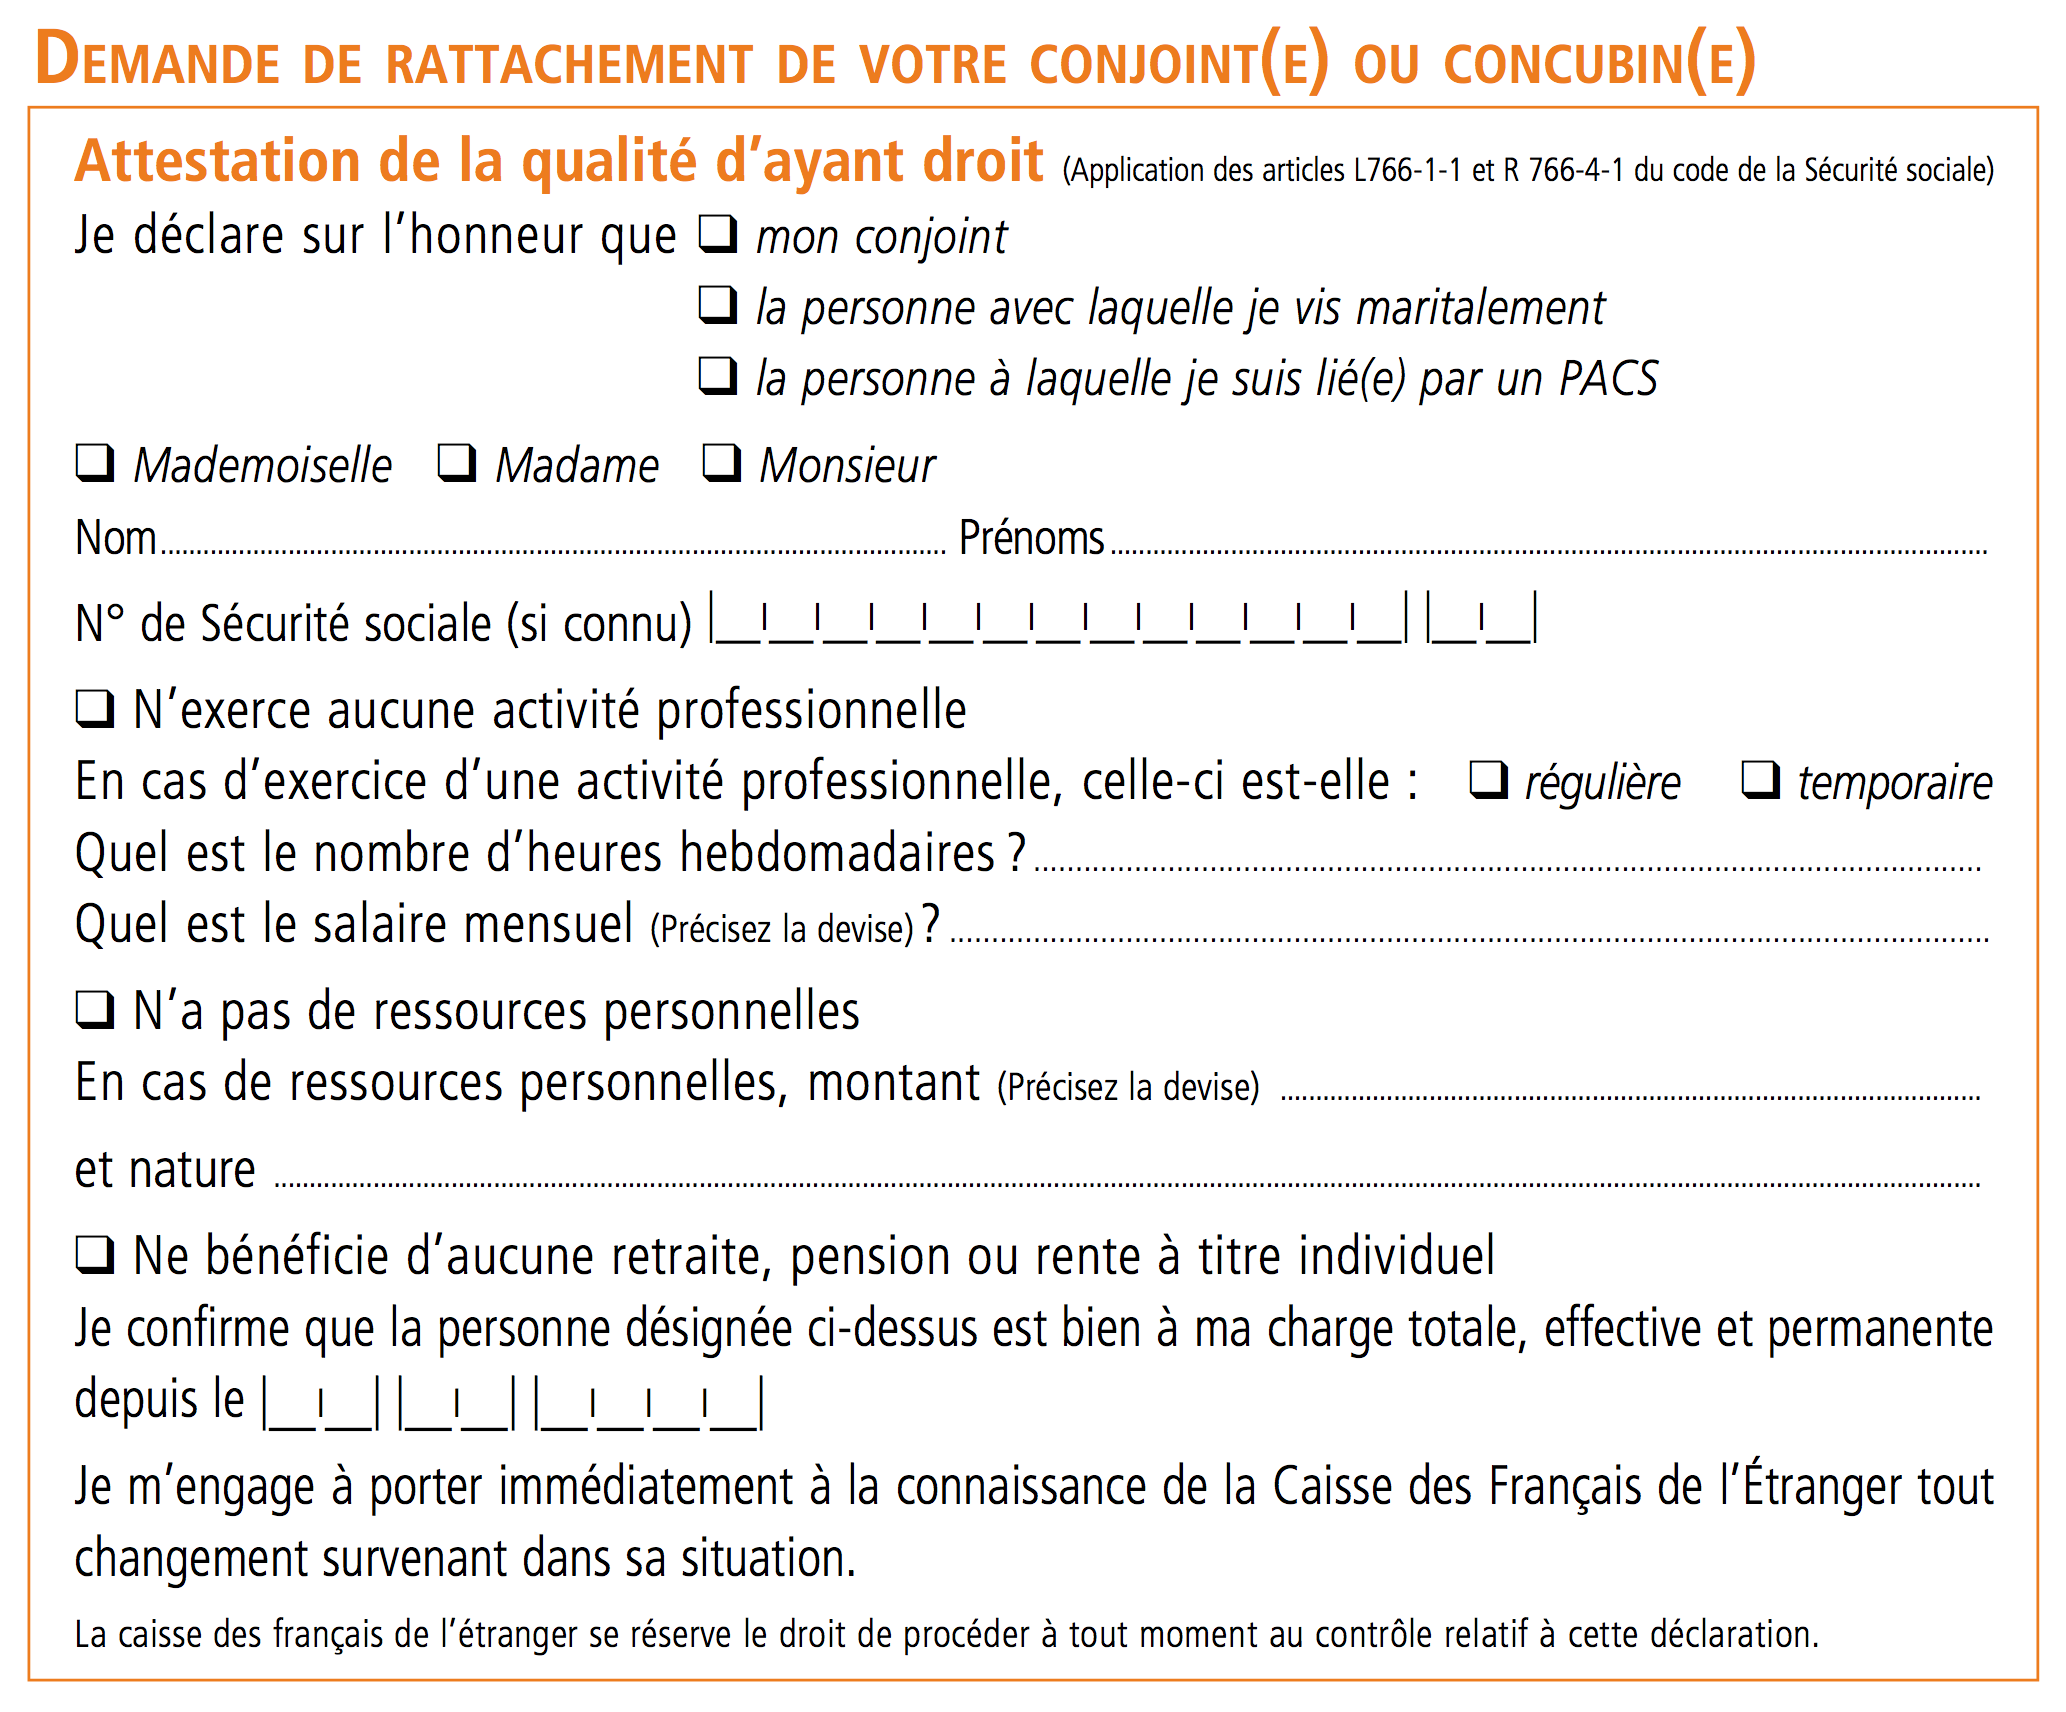 Rien de particulier ici non plus. Nous avons décidé de déclarer mon épouse comme “à ma charge totale, effective et permanente” à partir de notre date de départ saisie à la section précédente. Il faudra simplement prévenir la CFE du changement de situation une fois qu’elle aura un travail dans le pays de destination.
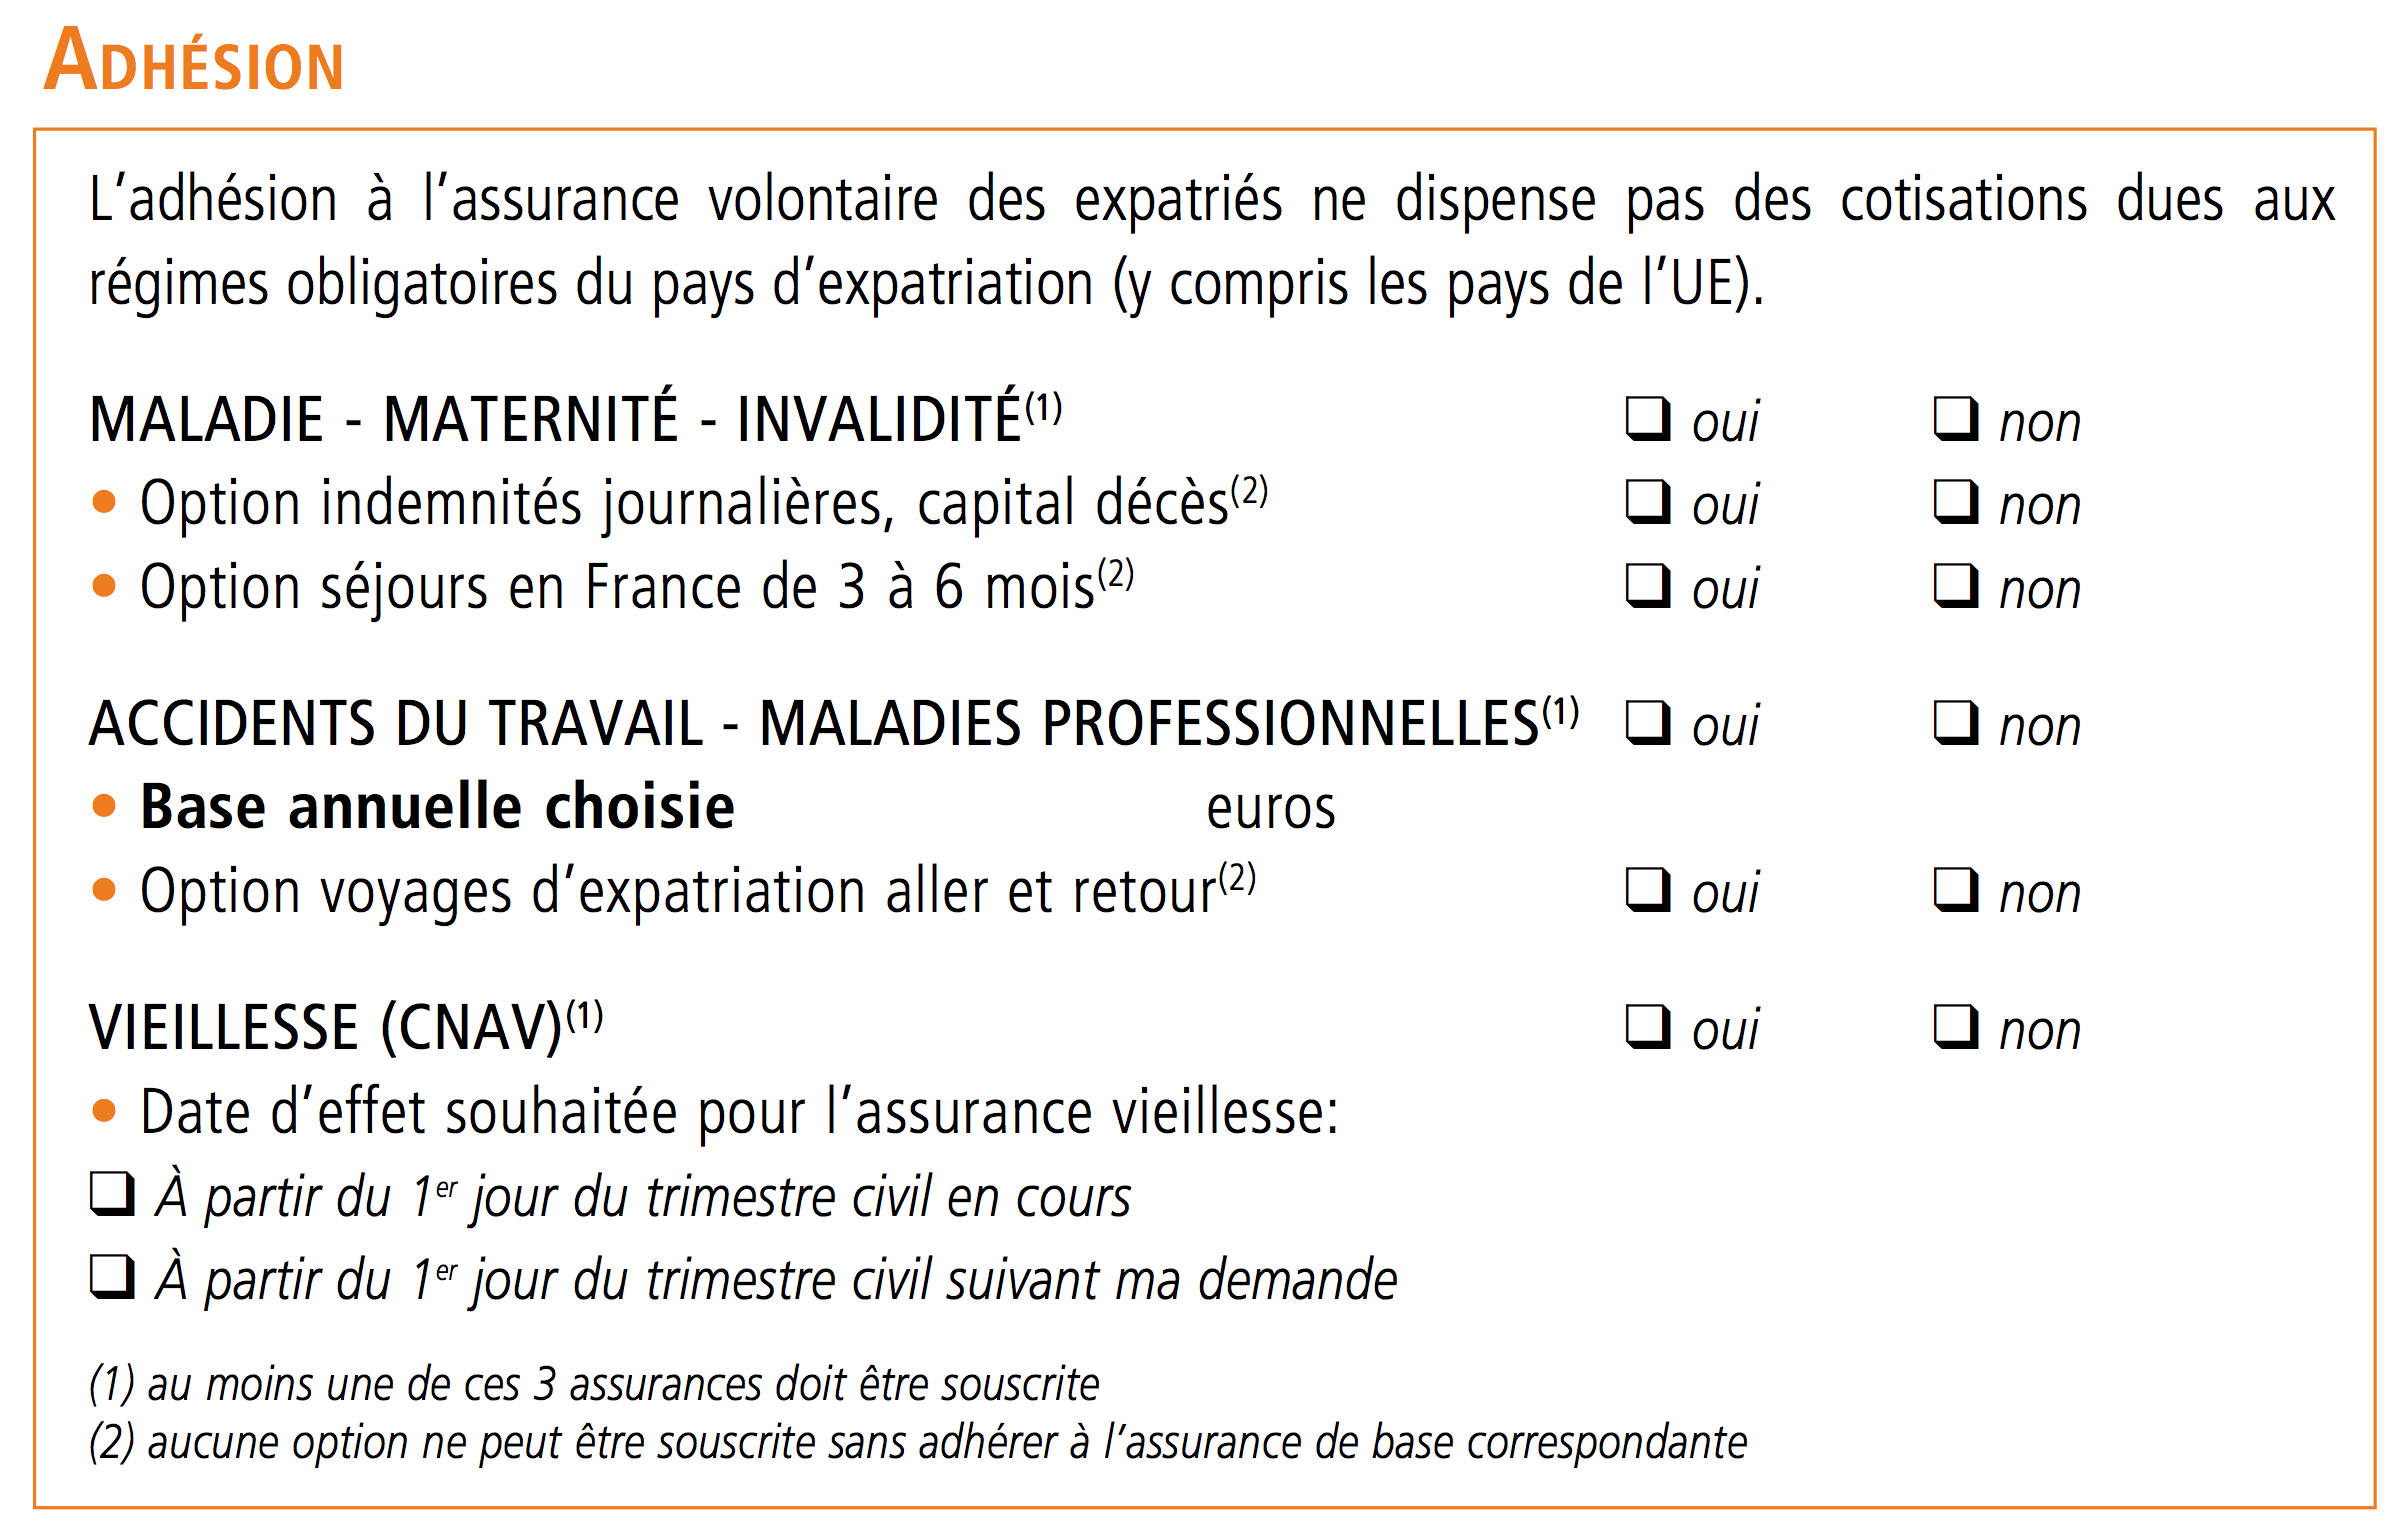 Nous voilà arrivé au gros morceau. Au moment où j’écris ces lignes, il est très difficile d’obtenir des informations sur les différentes assurances mais surtout leurs options sur le site de la CFE. Commençons par le plus simple : l’assurance vieillesse. Rien de bien compliqué ici, cochez non uniquement si votre pays a des accords en matière de retraite avec la France (n’hésitez pas à ajouter un commentaire si votre situation vous a amené à cocher non pour une autre raison, je n’ai pas la prétention de connaître toutes les possibilités !). Pour savoir si le pays en question a des accords avec la France, il suffit de se renseigner à la CNAV, la liste est sur la page suivante : Vous avez travaillé dans un pays signataire d’un accord avec la France. Pour l’assurance maladie, il est plus sûr de cocher oui, surtout si vous ne partez pas seuls et que votre famille vous accompagnant n’a pas de travail dès l’arrivée dans le pays. Encore une fois cela dépend grandement de la situation de chacun mais nous avons décidé de jouer la sécurité. Pour ce qui est des options : * “Option indemnités journalières, capital décès” : Similaire à ce dont on peut bénéficier en France. Cette option permet de bénéficier d’une meilleure couverture en cas d’arrêt maladie prolongé. * “Option séjours en France de 3 à 6 mois” : Permet d’étendre la protection sociale fournie par la CFE lors d’un séjour en France de 3 mois par défaut à 6 mois. Pour faire simple, prenez cette option si vous comptez revenir en France pour des périodes de plus de 3 mois et souhaitez être couverts dans ce cas. Pour l’assurance accidents du travail, c’est un peu pareil que pour l’assurance maladie, mais cela dépend beaucoup aussi de la couverture sociale que vous fournira votre travail dans le pays de destination. Nous avons encore décidé de choisir la sécurité et coché oui, mais avec la base annuelle minimale de 18 155 €, mon métier n’étant pas particulièrement à risque. Pour plus d’informations sur le montant des cotisations c’est par ici :
Salarié : Cotisations. Pour le calcul des indemnités, c’est par là : Salarié : prestations accidents. Pour ce qui est des options : * “Option voyages d’expatriation aller et retour” : Voilà ce qu’en dit le site de la CFE : “En souscrivant à l’option voyages d’expatriation vous bénéficiez des mêmes prestations en cas d’accident survenu lors d’un trajet effectué pour raisons professionnelles, entre la France et l’étranger.”, toujours sur la page Salarié : prestations accidents.
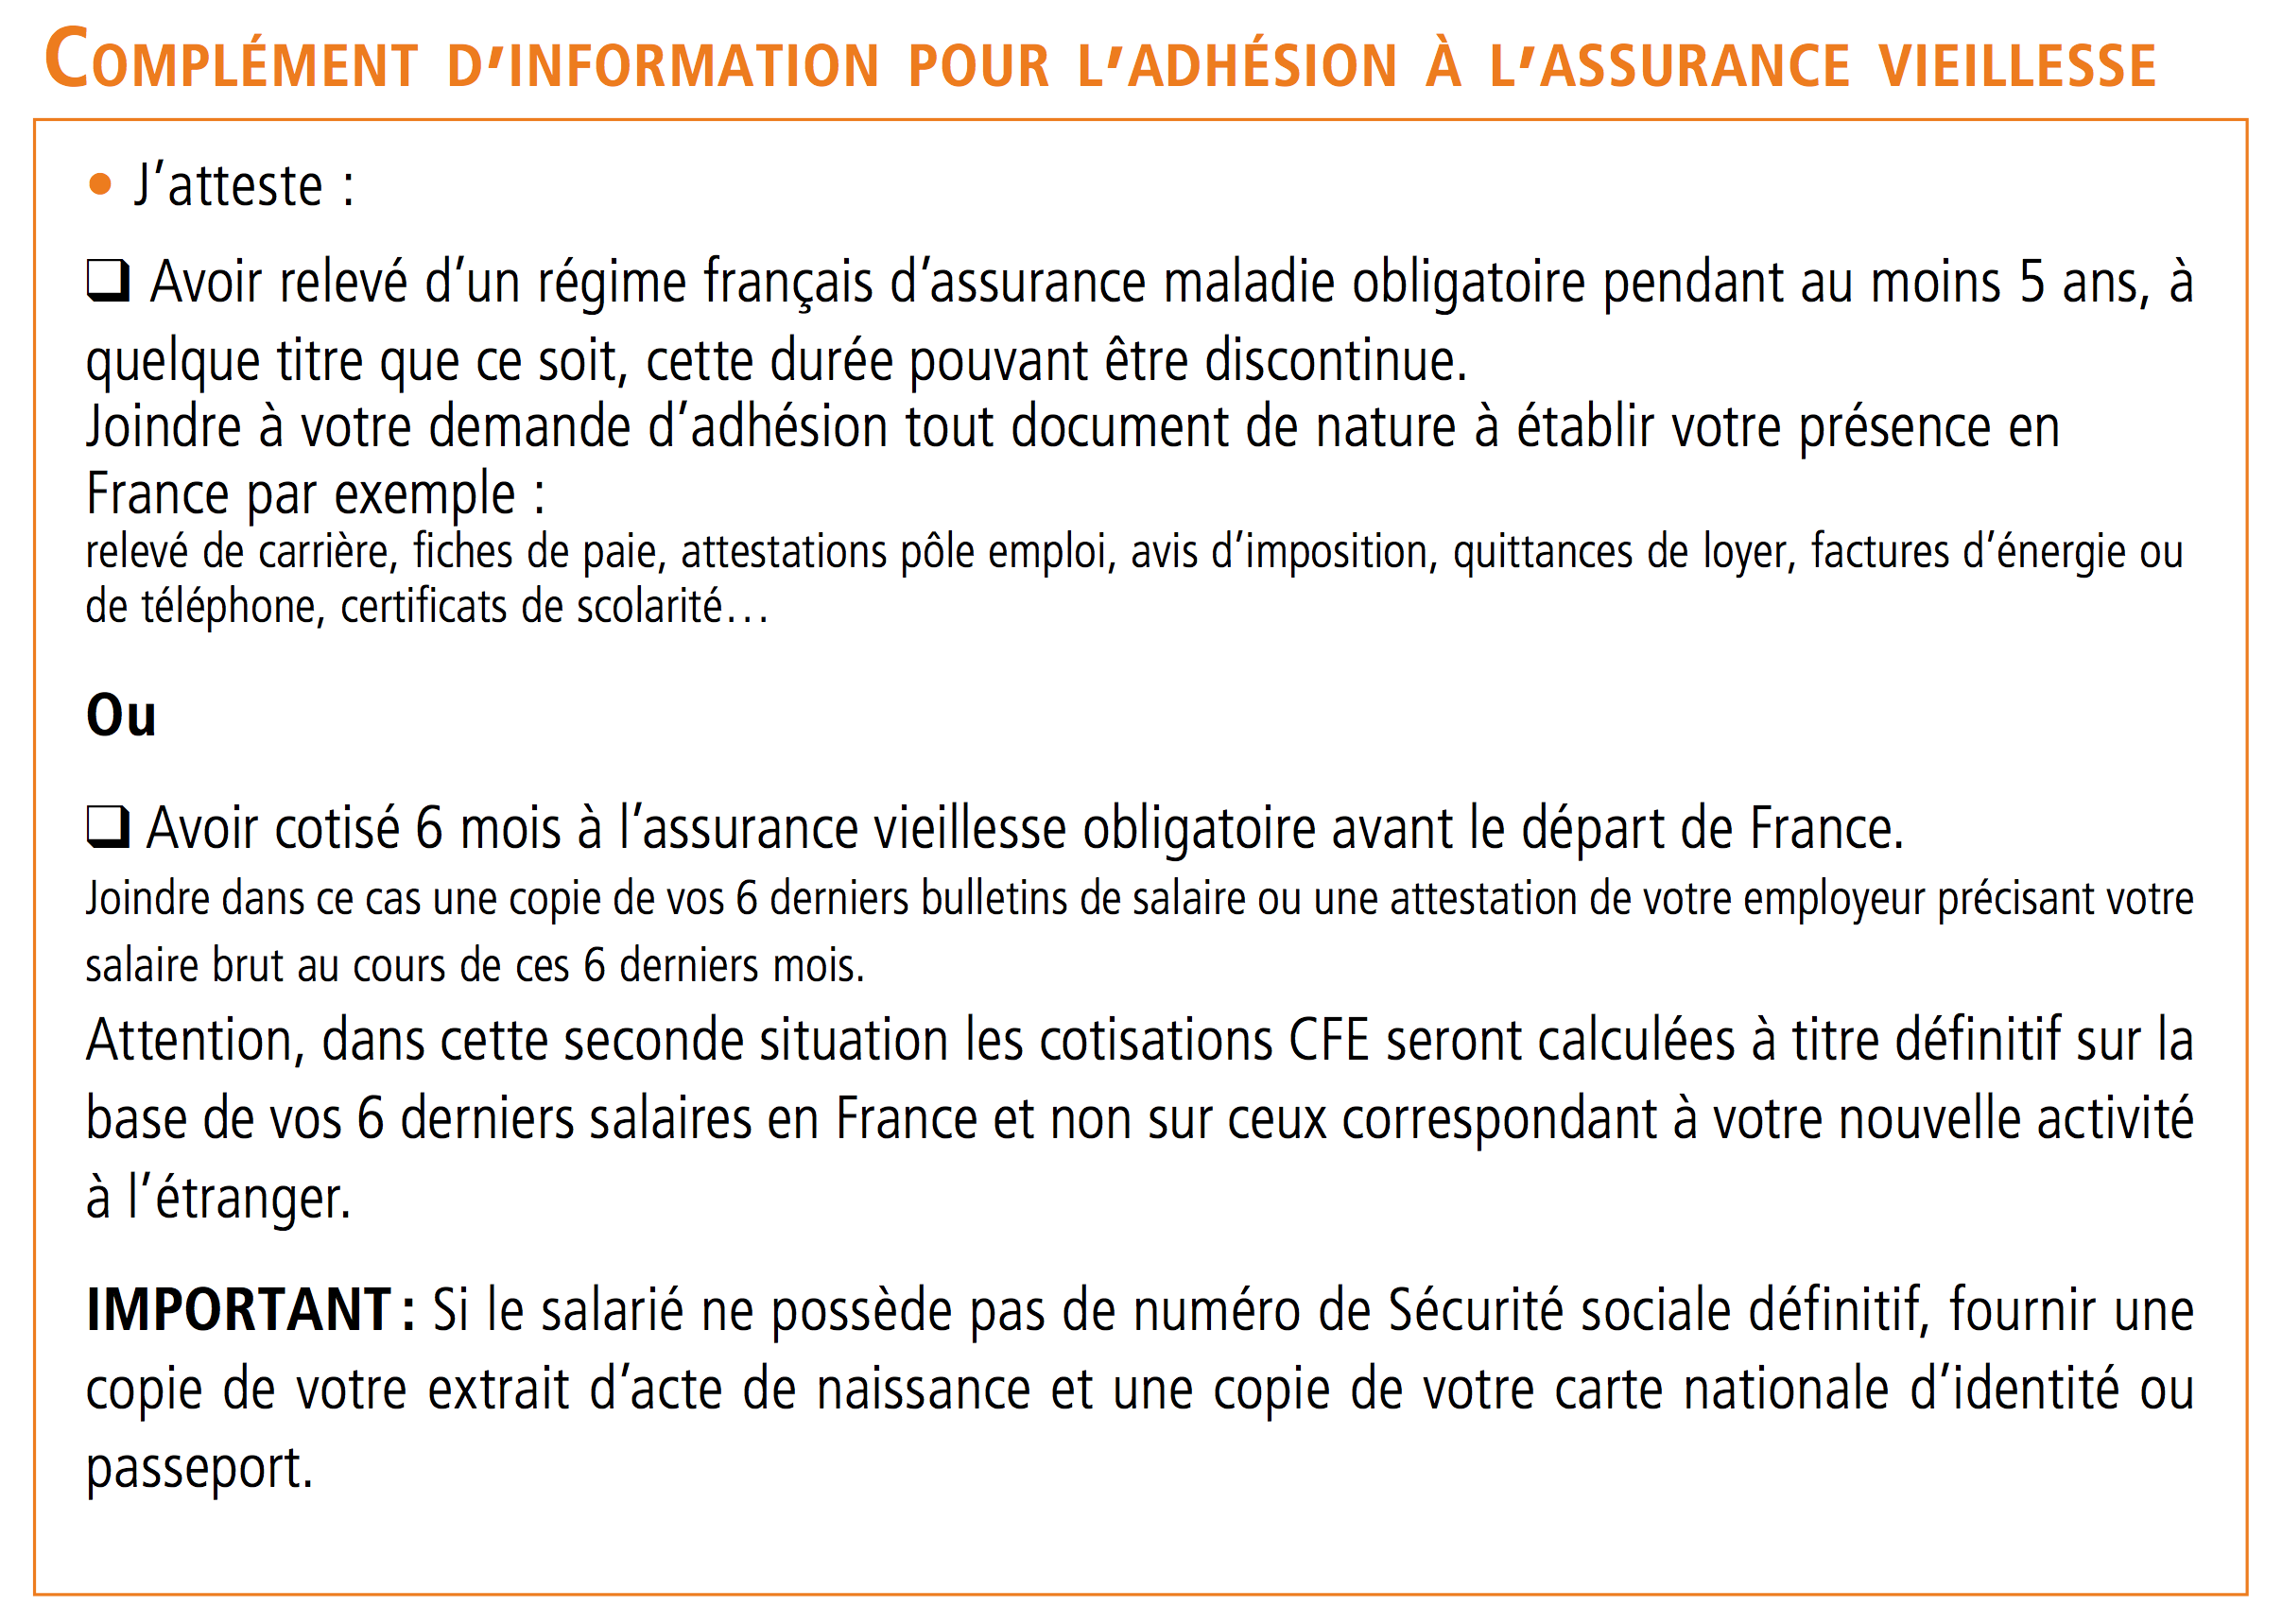 N’ayant pas adhérer à l’assurance vieillesse (voire section précédente), je n’ai pas de conseils particuliers concernant cette section.
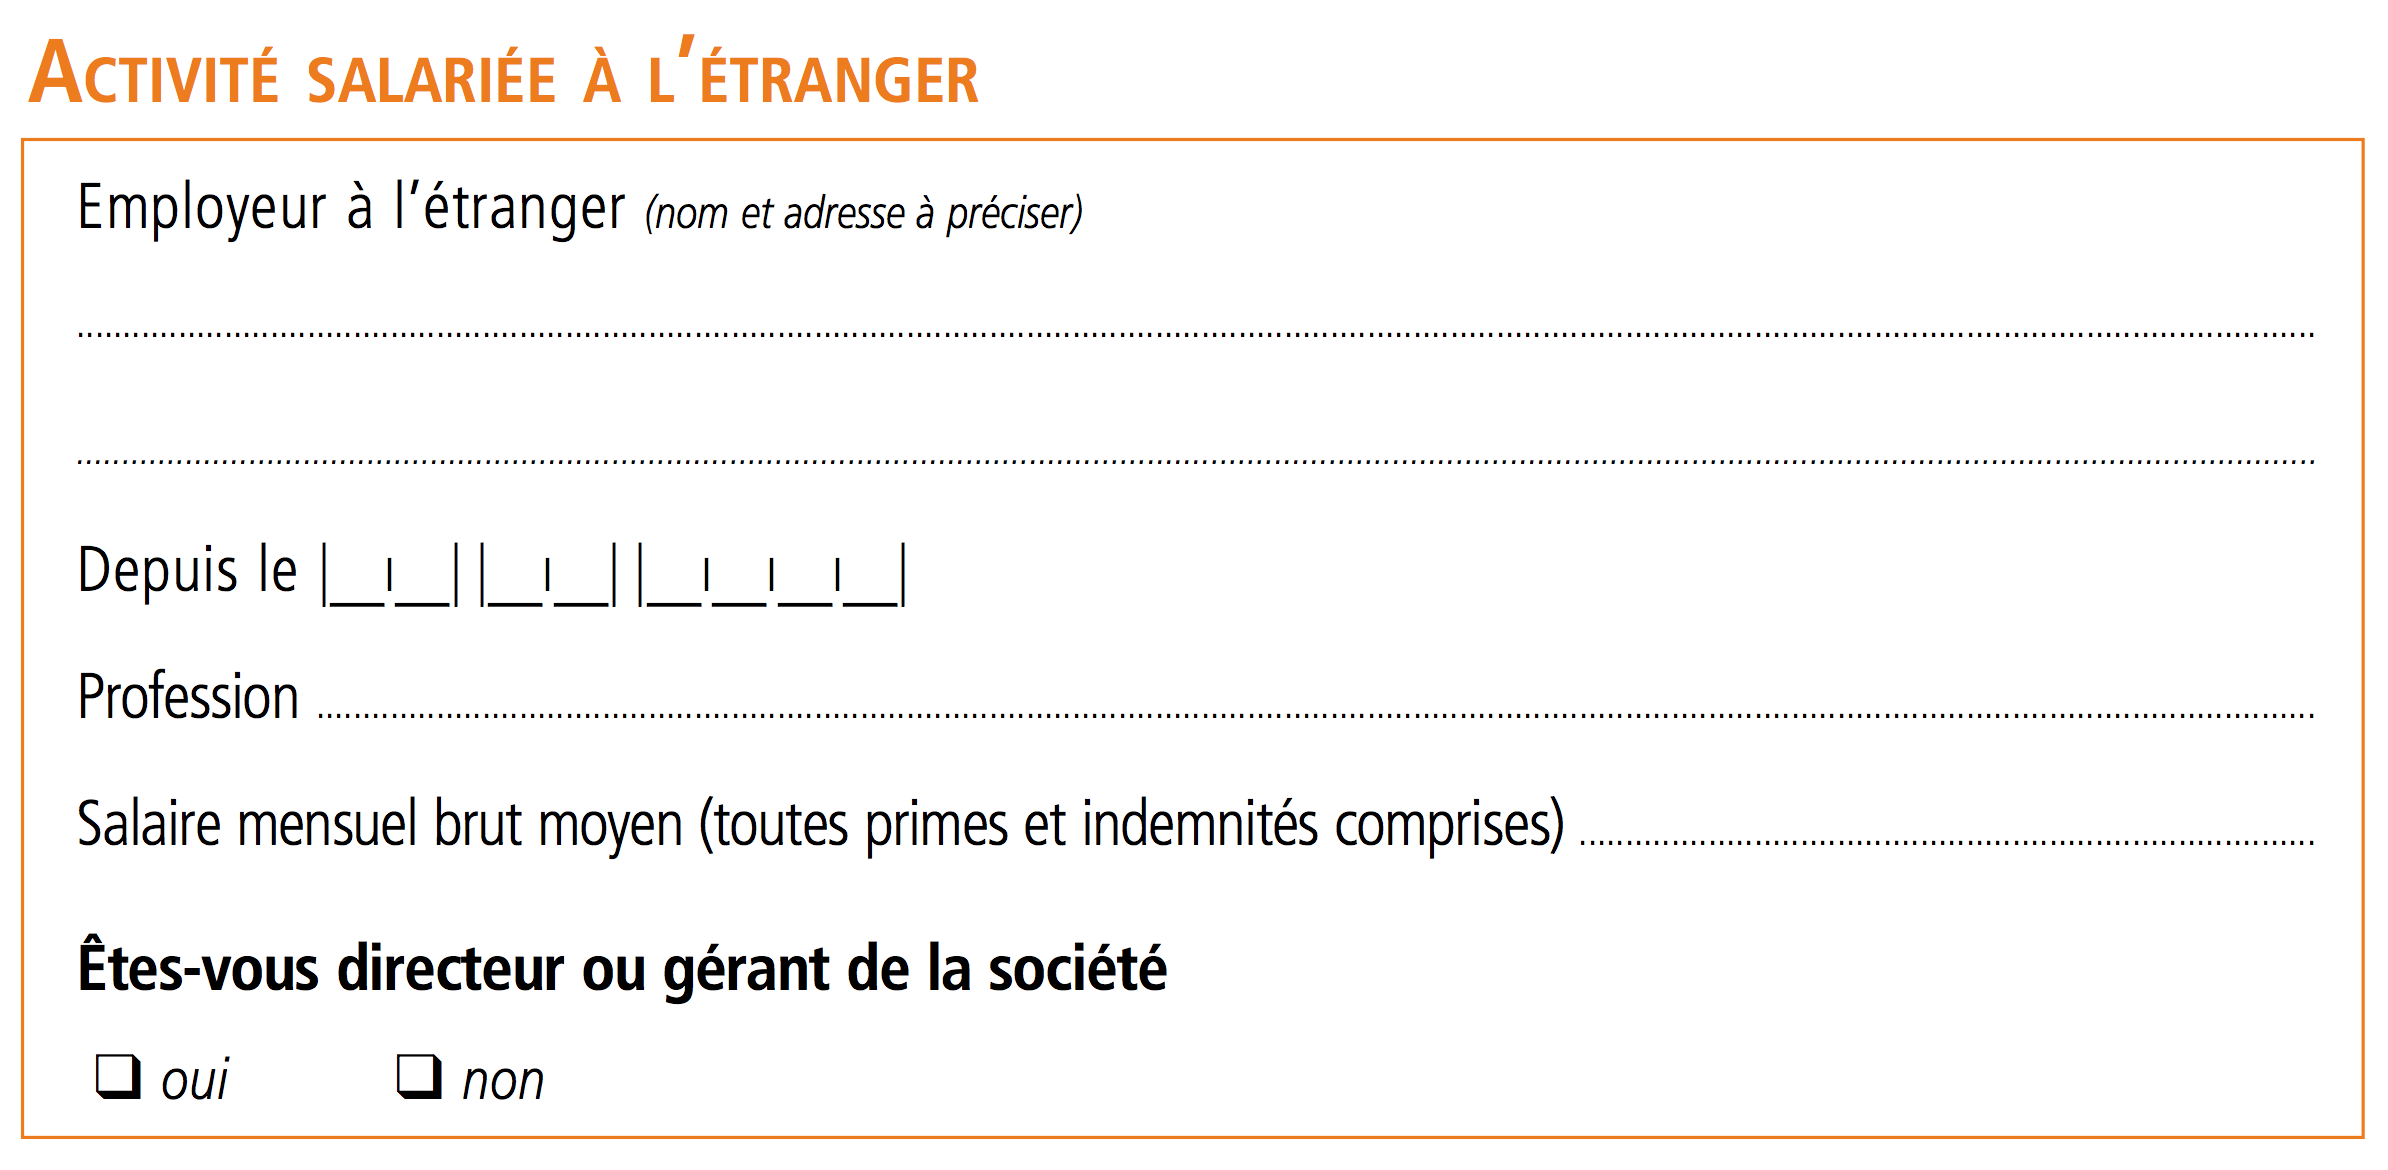 Rien de particulier dans cette section.
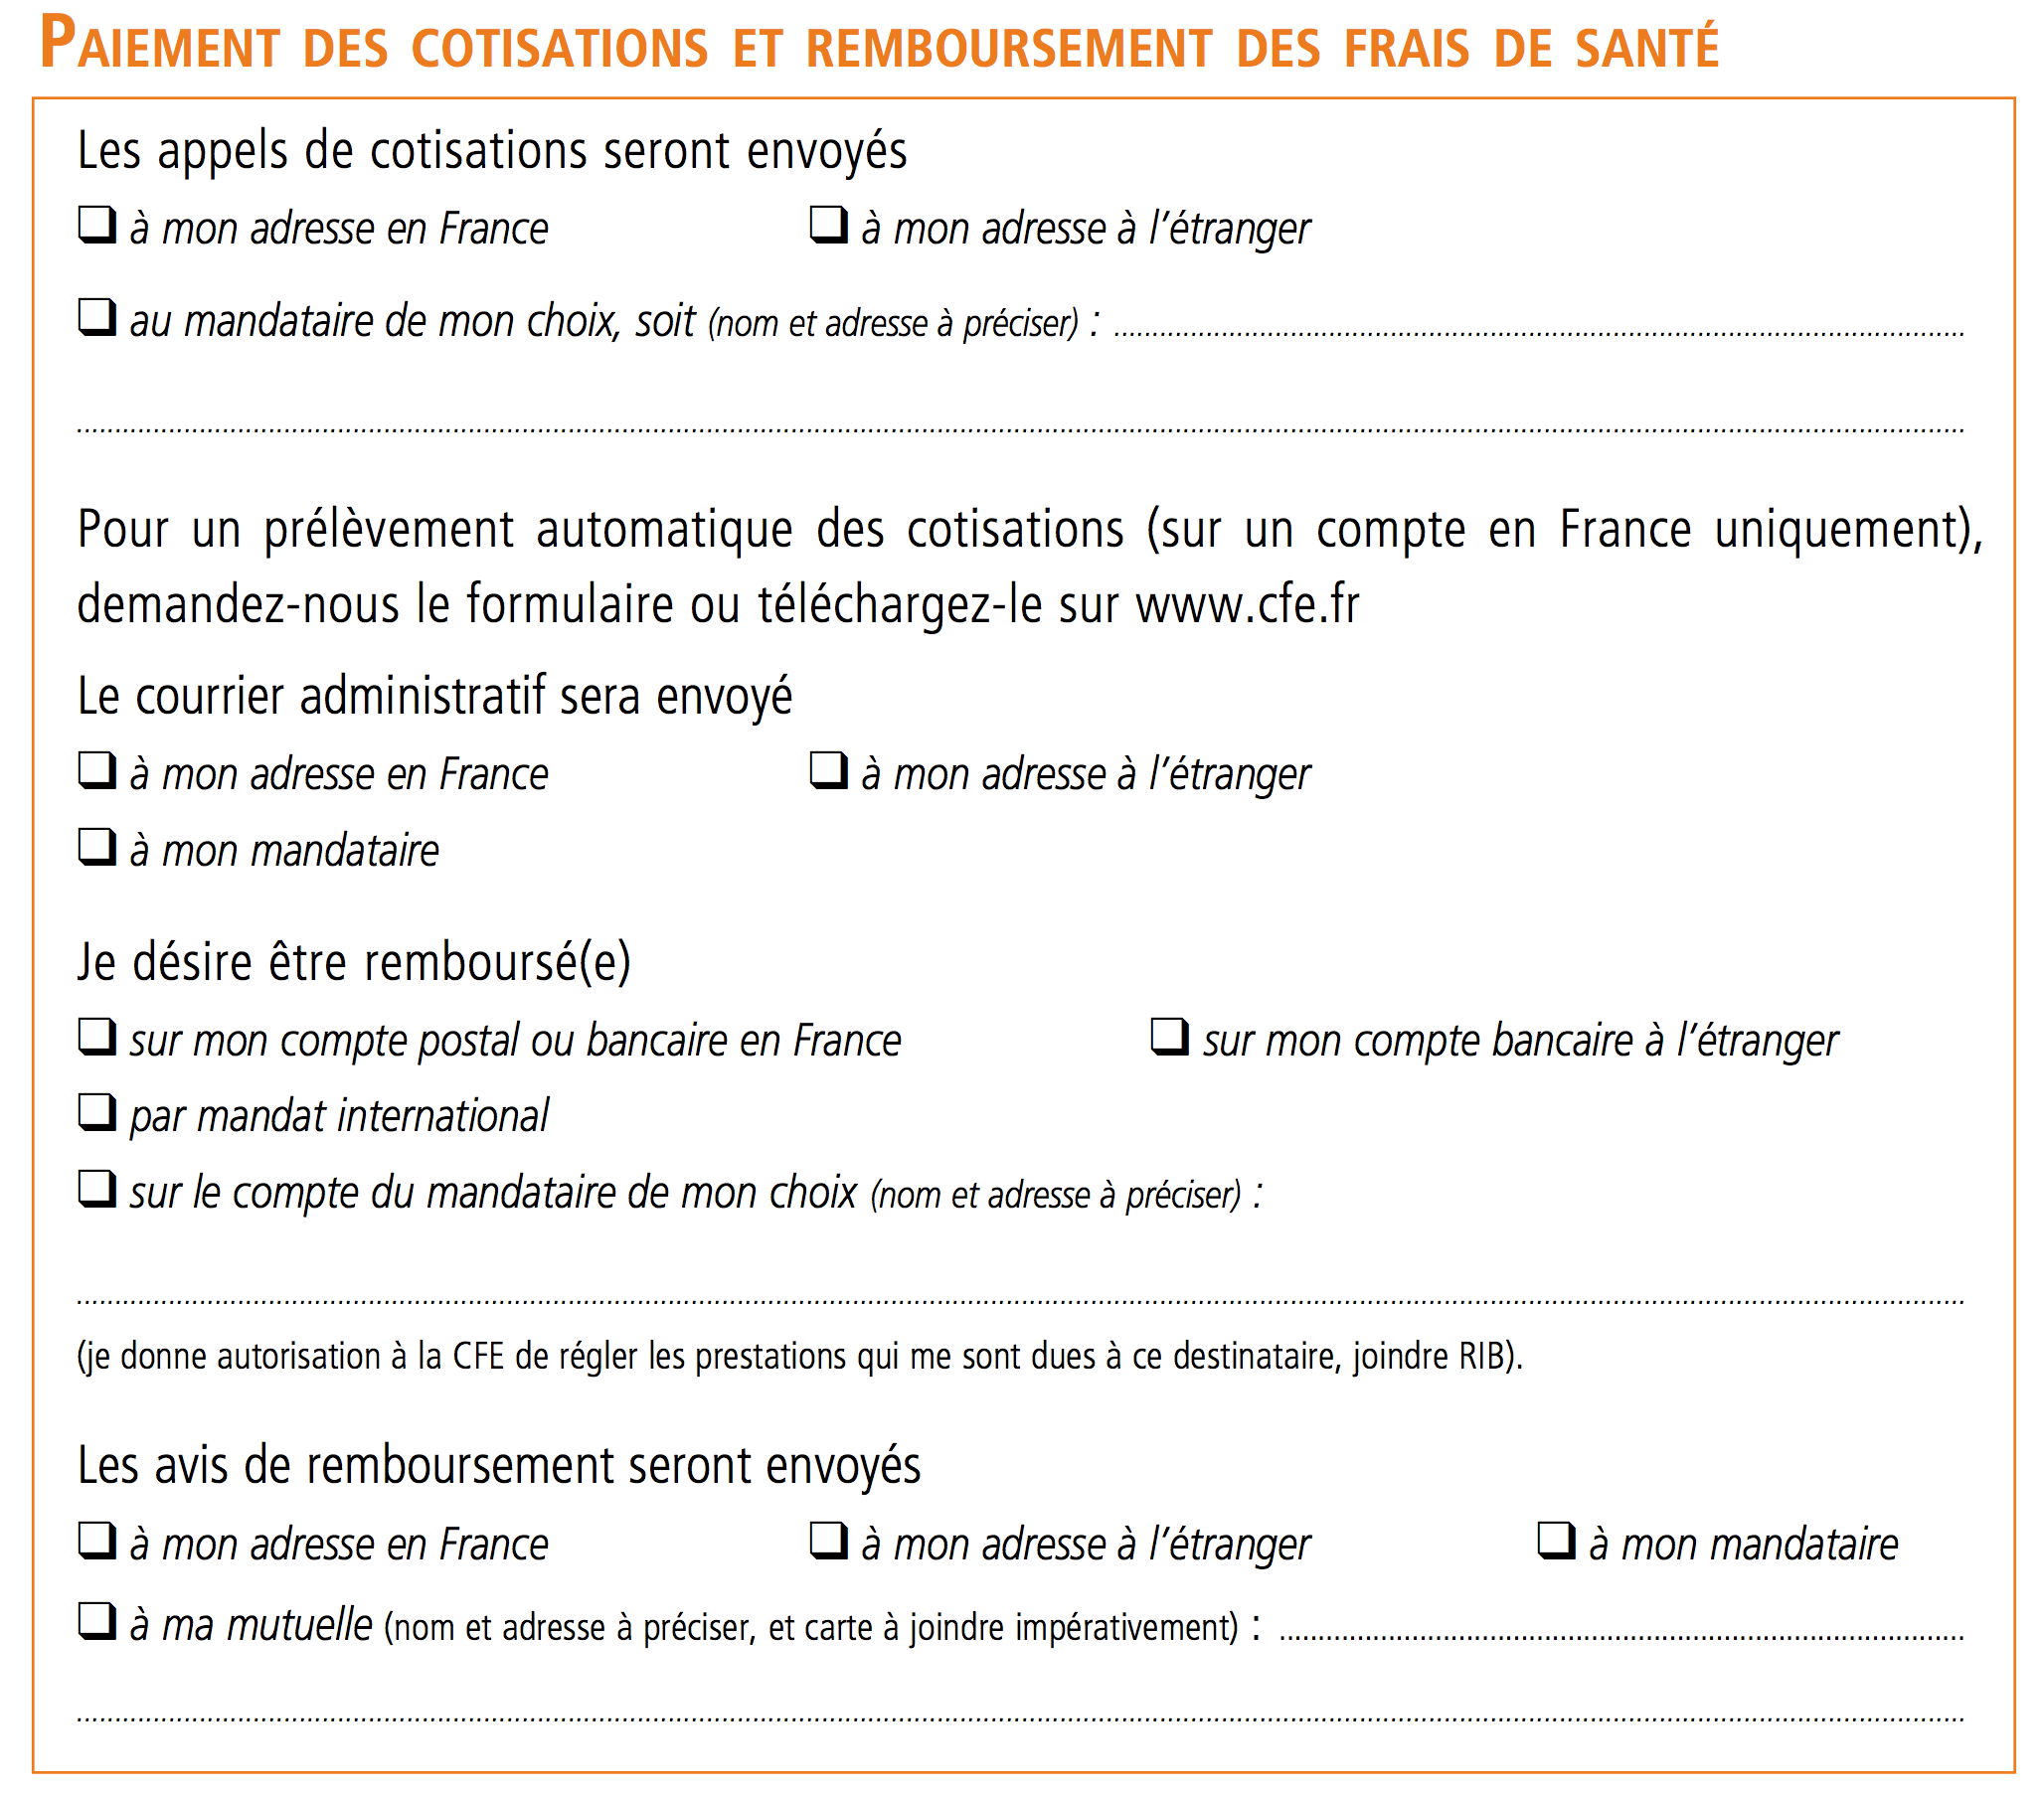 Pour ce qui est de la correspondance avec la CFE, nous avons décidé de tout recevoir à notre adresse française et d’être remboursé sur notre compte français. Simplement pour pouvoir fournir toutes les informations à l’avance. Nous avons choisi de bénéficier du prélèvement automatique en remplissant le formulaire disponible ici : Mandat de Prélèvement SEPA et en le joignant directement au bulletin d’adhésion.
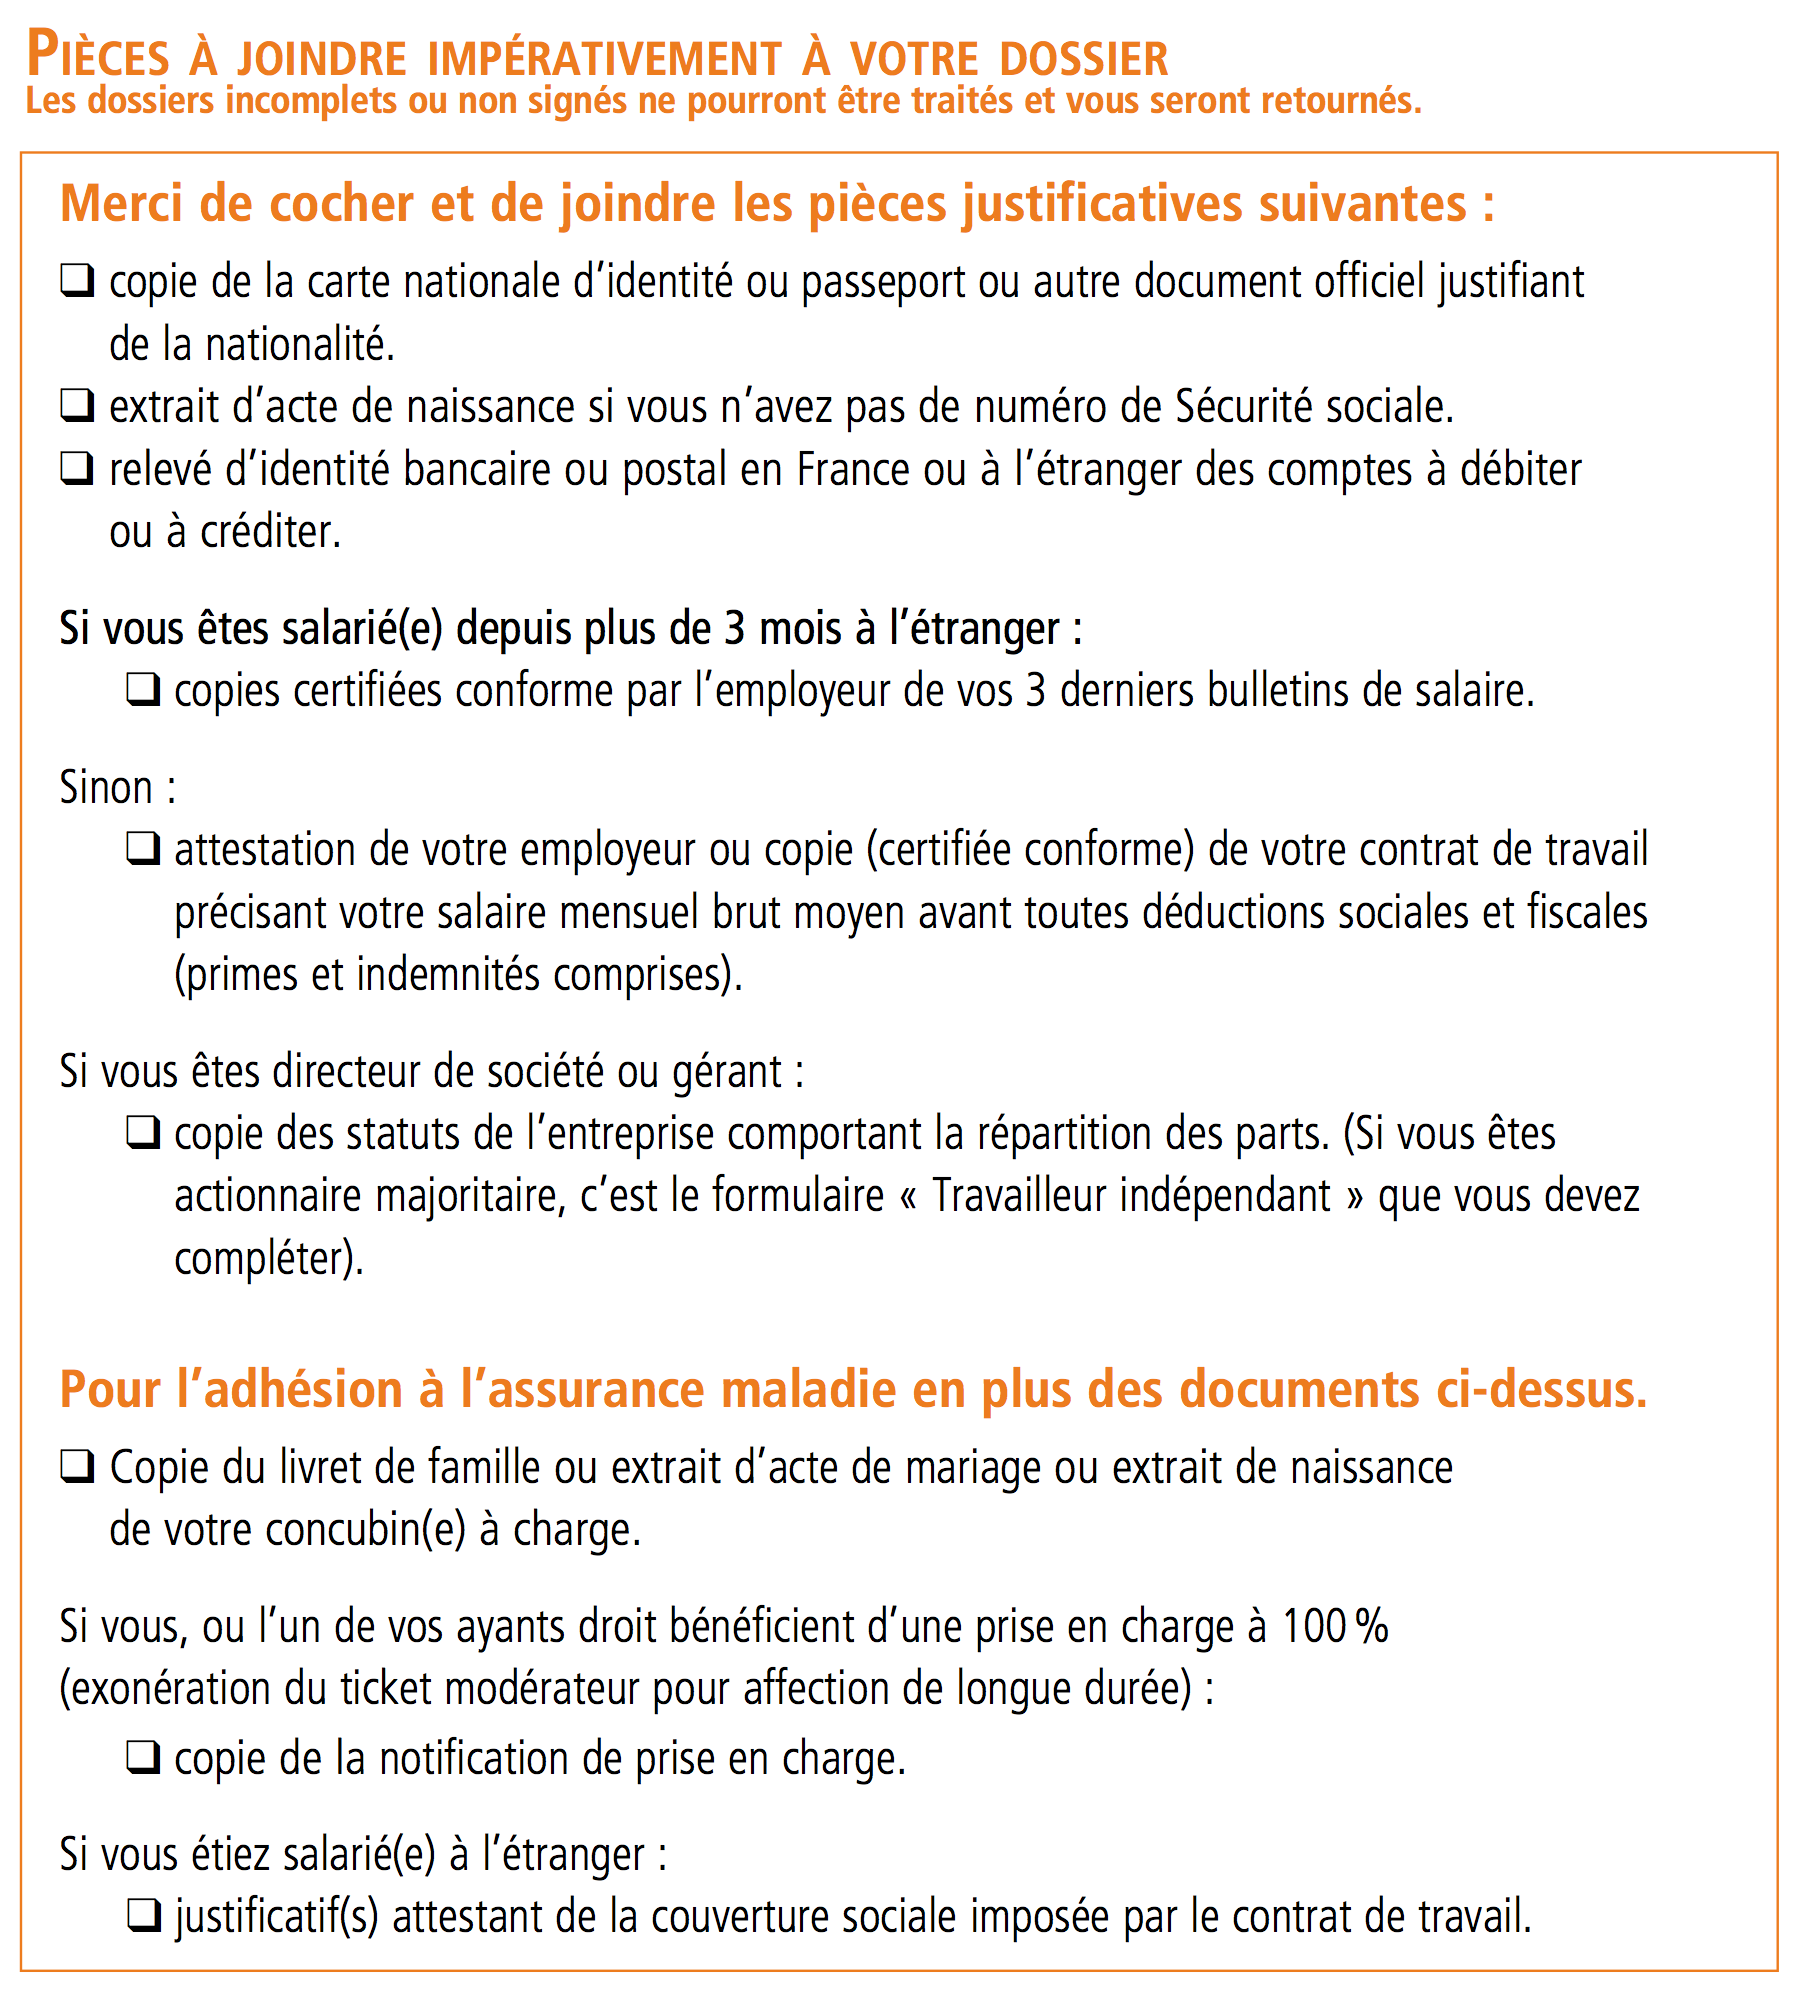 Rien de particulier ici. Comme dit plus haut les pièces à joindre sont relativement standards.
CFE – 160 Rue des meuniers – BP 100 – 77950 RUBELLES – FRANCE
Voilà pour ce qui est de l’adhésion à la CFE, et le prolongement de la couverture sociale en général, au moins pour la période de transition entre la France et le pays de destination.
Je rappelle que cet article est à but exclusivement informatif, qu’il ne reflète que mon expérience personnelle sur le sujet et que je ne peux en aucun cas être tenu responsable si certaines informations s’avèrent erronées ou obsolètes. En espérant que cela sera utile à d’autres. À très bientôt pour de nouvelles aventures !

Very recently, in one of my previous contracts, I had to develop a tool to easily convert an XML flux to a JSON structure and I made a little XML to JSON Parser library available on Github: https://github.com/Zedenem/XMLParser
I decided to submit this library to Cocoa Controls and, as of today, it has been reviewed, accepted and made available here: https://www.cocoacontrols.com/controls/xmlparser
It is the second of my libraries to be made available on this really select iOS Controls site ! The first one was a take at making a circular UISlider (https://www.cocoacontrols.com/controls/uicircularslider) and there is more to come.
If you wonder when to use a parser like this one, here is a summary of the context where I thought it was necessary to program it :
I was working for a client’s iOS app that was making a lot of use of REST Web Services, getting and posting JSON requests both to display datas and interact with the server. At some point, I discovered that part of the Web Services weren’t conforming to the global specification and were sending back XML data structures instead of JSON.
No one knew about it when we first conceived our app data model and the problem was that I had to use the XML structured datas the same way as I used the JSON ones (both when displaying it and when posting requests to the server). Given the state of the project and the available time, I decided that it was better not to do specific work dealing with the XML and better try, as soon as I get it from the server, to convert it to JSON and “hide” the complexity behind a conversion parser.
That’s how the XMLParser library was born.
If you want to know more about how it is built and how the conversion is made, there is a README file inside the Git Repository: https://github.com/Zedenem/XMLParser/blob/master/README.md
Article image used from Blackbird Interactive’s website : http://blackbirdi.com/wp-content/uploads/2010/12/json-xml.jpg
![]()
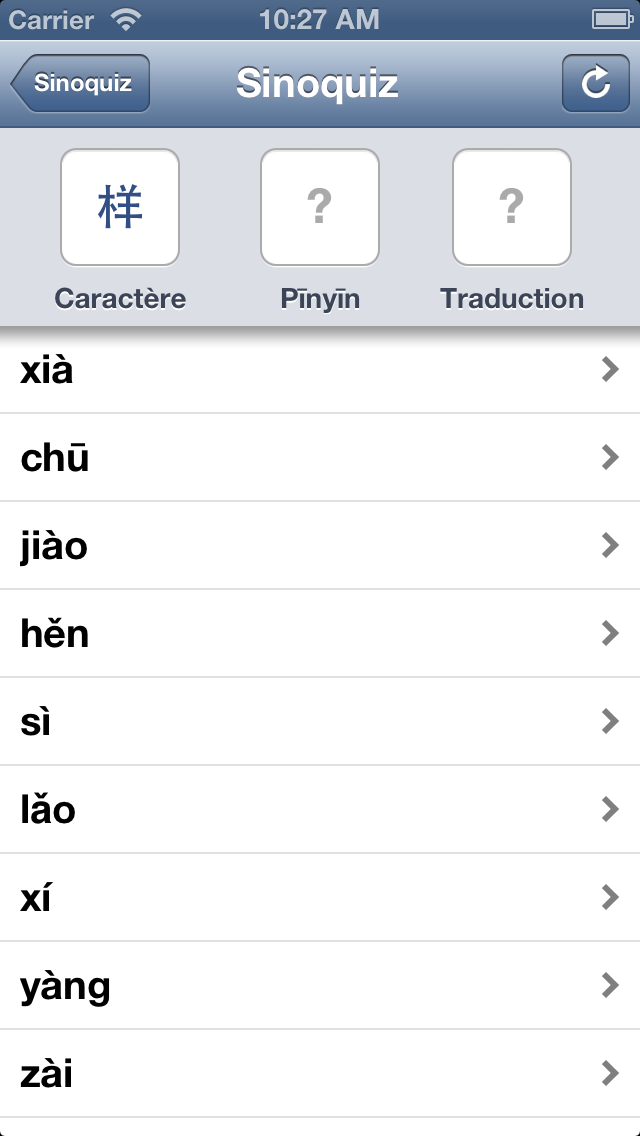
As my mission ended with my client at the end of May, I took the time to update sinoquiz in version 1.2 to add support for the iPhone 5 screen.
Sinoquiz allows you to test your knowledge in chinese characters, their pīnyīn writing and their translation with a fast and easy to take quiz.
For now, Sinoquiz is only available in french, stay tuned for the english version and the new iOS 7 redesign.
This article is a two parts step-by-step tutorial on how to easily expose RESTful web services using Play 2.x Framework and consume them in an iOS app using AFNetworking.
In this first part, I will explain how to easily expose your apps datas in JSON format via a REST Web Service, using the Play 2.x framework.
In the second part to come, I will give you some details on how to access the web services through your iOS app.
I will suppose that you already have a running installation of Play 2.x framework on your machine. If you don’t, here is a link to the Play Framework documentation, which provides a great Getting Started tutorial : http://www.playframework.com/documentation/2.1.1/Home.
To create your Play Application, just run this command on your favorite folder:
$> play new helloWeb
Play will now ask you two questions:
What is the application name? [helloWeb]
>
Which template do you want to use for this new application?
    1 - Create a simple Scala application
    2 - Create a simple Java application
> 2
Just press Enter to answer the first question and type in 2 to the second to choose the Java template. Play will now say it better than me:
OK, application helloWeb is created.
Have fun!
We are now going to write a simple method that returns a JSON result. Go to your controllers folder (./app/controllers) and open the Application.java file.
Application.java must contain its default definition which renders your index.html page:
package controllers;

import play.*;
import play.mvc.*;

import views.html.*;

public class Application extends Controller {
    public static Result index() {
        return ok(index.render("Your new application is ready."));
    }
}
We are going to add our method, calling it helloWeb(). Just add the following method below index():
public static Result helloWeb() {
    ObjectNode result = Json.newObject();

    result.put("content", "Hello Web");

    return ok(result);
}
Here are the steps taken to create this simple method:
ObjectNode called result"Hello Web" for the key "content"result via the ok() method to associate it via a 200 HTTP Status CodeTo make it work, we will need to add these two imports:
import org.codehaus.jackson.node.ObjectNode;
import play.libs.Json;
That’s it ! We created our Web Service method, now all we need is to expose it!
Last step : go to your conf folder (./app/conf) and open the routes file.
routes must contain its default definition which declares two routes, one for the Home page and another for all your assets:
# Routes
# This file defines all application routes (Higher priority routes first)
# ~~~~

# Home page
GET / controllers.Application.index()

# Map static resources from the /public folder to the /assets URL path
GET /assets/*file controllers.Assets.at(path="/public", file)
All we have to do now is to declare our Web Service’s route, just like this :
# Hello Web (JSON Web Service)
GET /helloWeb controllers.Application.helloWeb()
Done! You can access your newly created Web Service at its declared URL path. By default:
http://localhost:9000/helloWeb
Which should display :
{
    "content":"Hello Web"
}
Now that you know how to expose web services, what about code organization? Where would you or do you put the WS declarations? One or several of your existing controllers? A specific one?
I would greatly like to have others opinion on this, so feel free to leave a comment.
At the beginning of this week, I launched my new App Showcase website :
http://www.strikingly.com/zedenem
It’s still under construction as I am writing this post and I will had more apps in the future.

As you have probably guessed, it’s powered by a wonderful tool to build promotional websites, called strikingly.
I hope you will like this showcase, feel free to give me any comments on how to improve it.

At WWDC 2013, Apple started its keynote address with a video describing its intentions as a products manufacturer and introducing its new campaign “Designed by Apple in California”.
What a better example of what Simon Sinek explains at TEDxPugetSound about driving behaviour ?
In this talk, Simon Sinek explains how great leaders inspire actions by reversing the usual chain of communication from “What we do” to “How we do it” with sometimes a hint of “Why we do it” to a Why-first communication. He calls these three levels “What, How, Why” the golden circle. Simon Sinek takes the example of Apple’s way of selling a computer :